Showing posts with label Co-Habitant. Show all posts

Friday, January 14, 2011

The Case of the Disappearing Bike Lanes

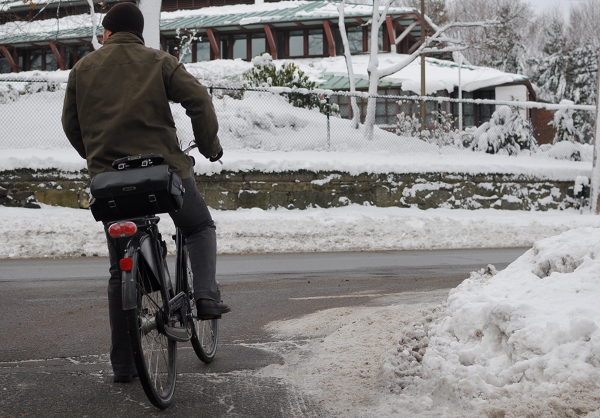
One challenge to expect when cycling in the winter, is that bicycle lanes tend to "disappear" - either under snow banks, or under cars that take over the bike lane when snow covers their parking spots. 

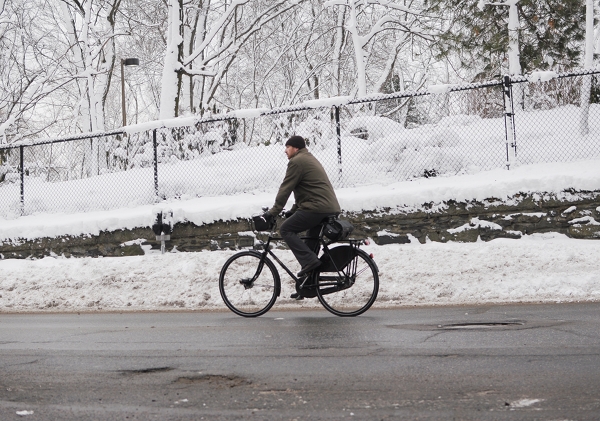
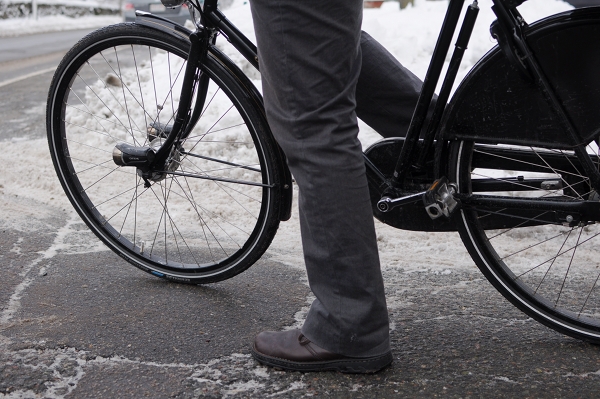
The pictures here are of Day 3 after our latest snow fall, and the plows have been working continuously. Still, the snow banks cover a good three feet or more of the the righthand side of the road in both directions.

For those who live in areas with well-developed cycling infrastructure, this change can be especially difficult: Accustomed to traveling almost exclusively via bike lanes, having to now cycle directly with car traffic can be a bewildering experience. That is one reason I think it is important to get comfortable with "vehicular cycling" even if it does not seem like you need it. Once the snow arrives, there is no way to tell what part of your journey will have the familiar bike lanes available and what part will dump you directly into the traffic lane.

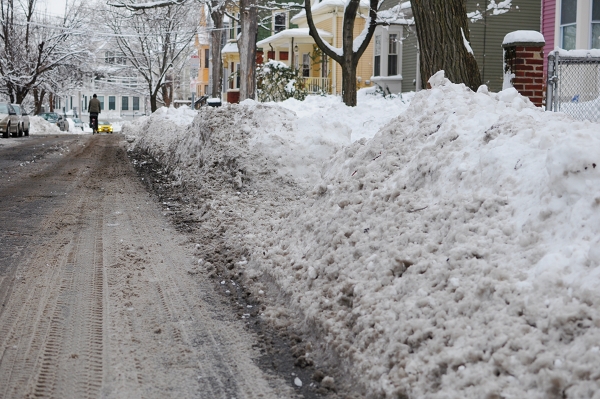
While side streets are quieter than main roads, the drawback is that they are not plowed as thoroughly. Here you can see that even the narrow space in the middle of the street is covered with a layer of snow. The car and the cyclist ahead must carefully navigate around each other in sharing this space, ideally at low speeds.

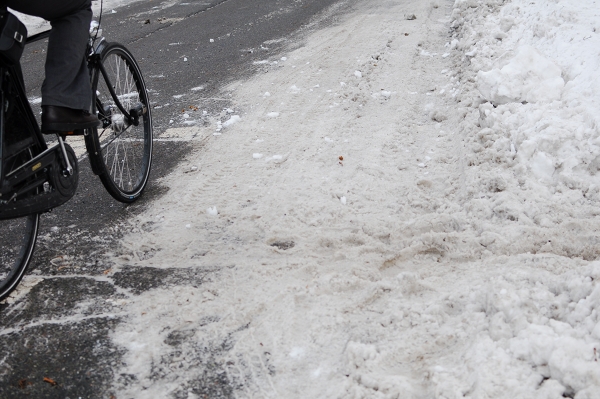
In addition to the limited space, there is also a greater number of obstacles in the road than usual: There are newly formed pot holes, which are not infrequently iced over, and also just chunks of snow and ice strewn all over. Cycling can feel like a technical trial, where the cyclist is forced to do a little dance to avoid ice chunks on one side and potholes on the other - all while remaining keenly aware of the presence of cars behind them.

I am not one to sensationalize the supposed dangers of cycling. But when the roads start to look like this, I think it is important to be aware of the potential pitfalls. All the things you took for granted earlier - from the texture of the asphalt, to the way your bike handles, to the availability of bike lanes, no longer hold true.

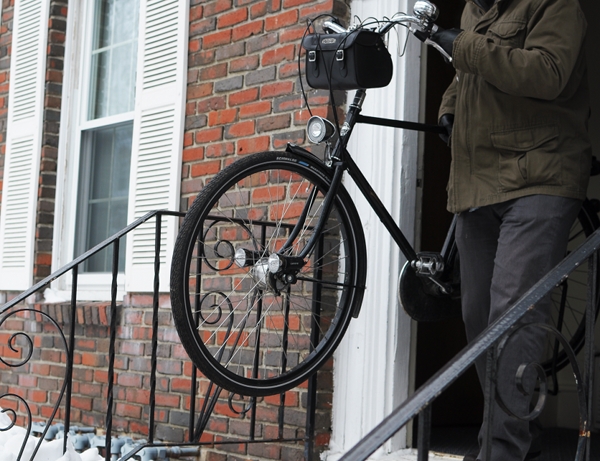
When the weather is like this, all you can do really is know what to expect - and use your judgment to determine whether you can handle it. While the presence of bike lanes is not particularly important to me, the loose chunks of hard snow and ice are what deters me from cycling just now. It's too stressful to navigate around them while dodging cars, so I will wait it out. The Co-Habitant, on the other hand, is delighted to ride in these conditions. To each their own!

Monday, January 3, 2011

Woven Dress Guards for Drilled Fenders

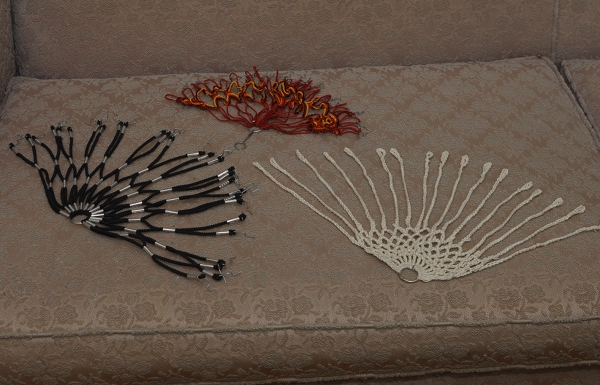
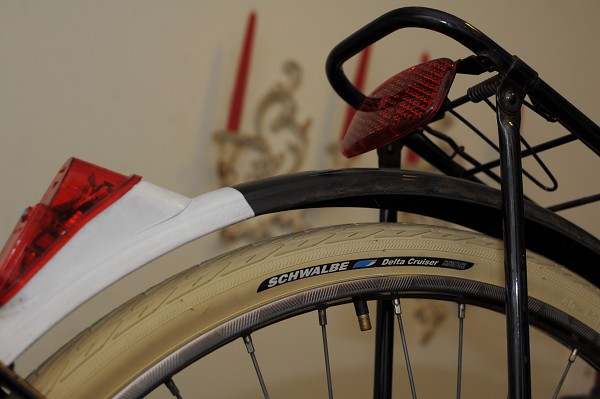
I love the look and feel of woven dress guards. To me they seem more graceful than the solid vinyl type - allowing for the wheel's spokes to remain visible, while still protecting clothing from flying into them. They can also give a bicycle more "personality," as there are many patterns and different installation methods to choose from. A year ago, it was almost impossible to obtain dress guards like these without making them yourself. However, now there are several options available and I have done my best to get my hands on them.

Some of the most beautiful woven dress guards available today are these handmade ones by Bobbin & Sprocket. They can be crocheted in different patterns, according to your specifications (you can see them here on Bobbin & Sprocket's own bike and here on an ANT bike). I ordered a set for my mixte a couple of months ago, but have yet to attach them - because I've decided to do a drilled-fender installation, rather than use the clips provided. The clips don't attach securely enough for my fenders - and I am weary of having the guards fall off and get tangled in my wheel spokes. Earlier, I reviewed the Dutch Simeli dress guards, and clip and fender compatibility was also a problem (they only work on bikes where there is a lot of room between the fender and the tire).

For these reasons, I don't think clipping woven dress guards to fenders is the ideal solution, and suggest the traditional drilled-fender installation instead. I had this done to my vintage Raleigh DL-1 last year, using a simple set of dress guards that a reader had sent me from Portugal. The fancy ones in the picture above were a gift from a friend in Autsria, and are waiting for the right bicycle.
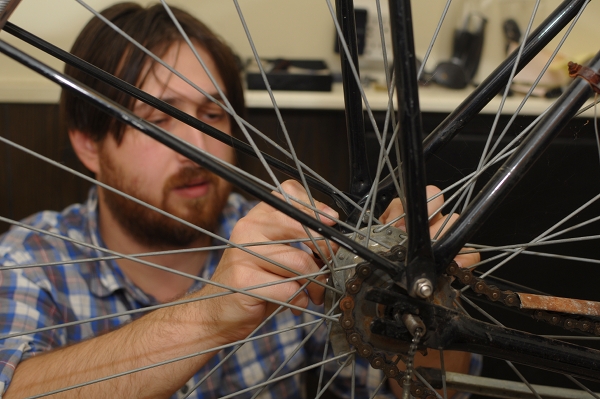
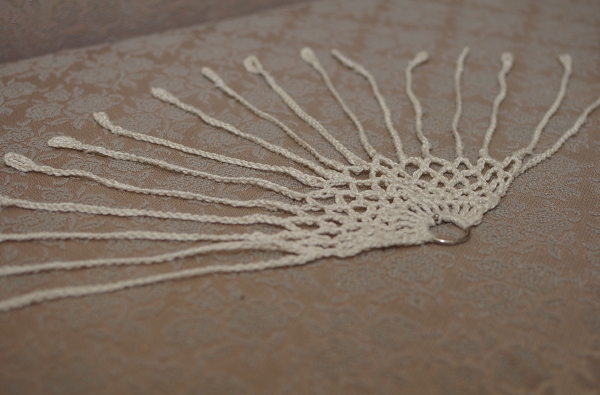
The ones I decided to install on my Gazelle were this set I bought from Mike Flanigan of ANT, who has recently begun to order them from Europe. They are simple, stretchy and durable, and I thought the colour scheme suited my Gazelle nicely.  Drilling fenders for dress guards may seem like a daunting task, but the actual act of installing them is not difficult, if you have a good drill. What's difficult is making the commitment: You can't "undo" the holes in your fender once they are there, and nearly every set of dress guards requires a different number of holes.

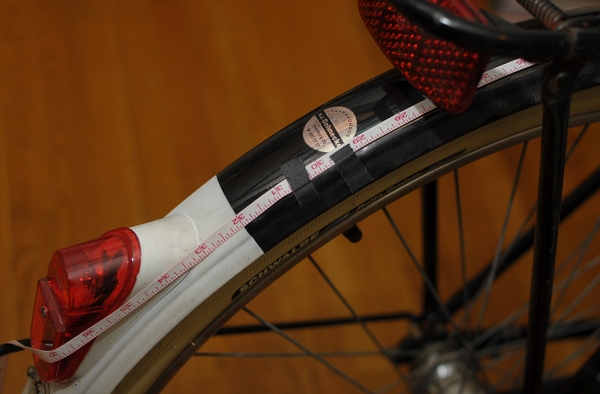
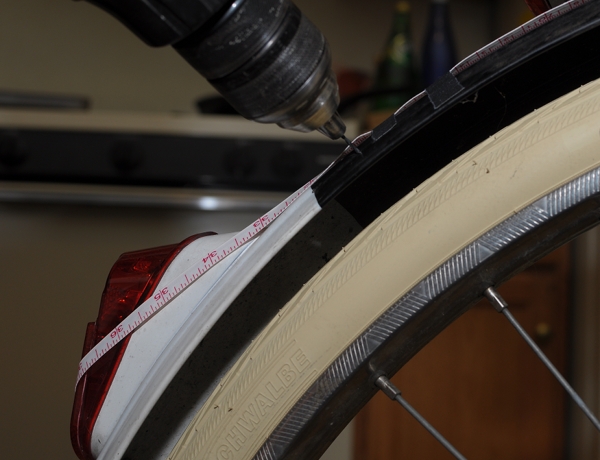
The first step is to consider what part of the wheel you want the dress guards to cover. There is no right or wrong in this regard: If you look at vintage dress guard installations, they are all over the place. Some prefer to cover 1/4 of the wheel, others prefer to cover the entire top half, and others still prefer something in between. Once you choose the coverage area, mark its beginning and end with masking tape. Then, evenly attach a tape measurer along this area. This will allow you to easily mark where the holes are supposed to be. The dress guards I used required 28 holes, which ended up being 1" apart.

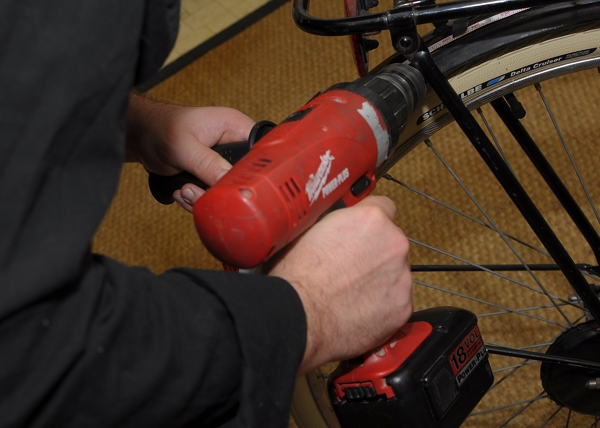
Depending on what bike you have, you do not necessarily need to remove the rear wheel or even deflate the tire when drilling the holes. On Dutch bikes and English Roadsters, there tends to be so much room between the tire and fender, that if you insert the drill bit as far inside the drill as it will go, it will be too short to reach the tire after piercing the fender.

The hooks that come with dress guards are about as thick as medium-sized paperclips, so 1-1.5mm is a good size for the holes. We used a 1mm drill bit.

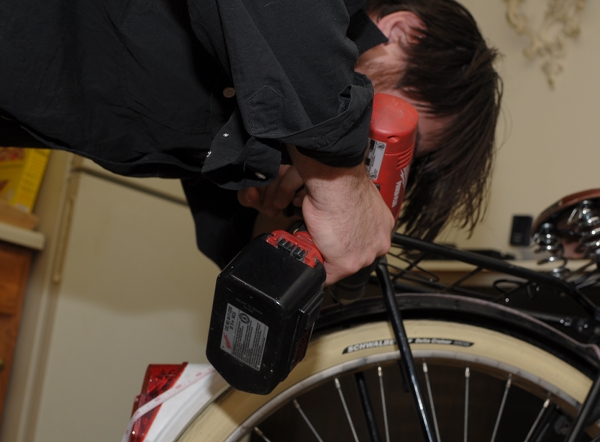
It is good to have a drill with a side handle attachment, as this allows you to keep your hands steady and to have more precise control over the drilling.

I would also suggest using a fresh drill bit and having a spare one before you start, in case it breaks. 

And here we go!

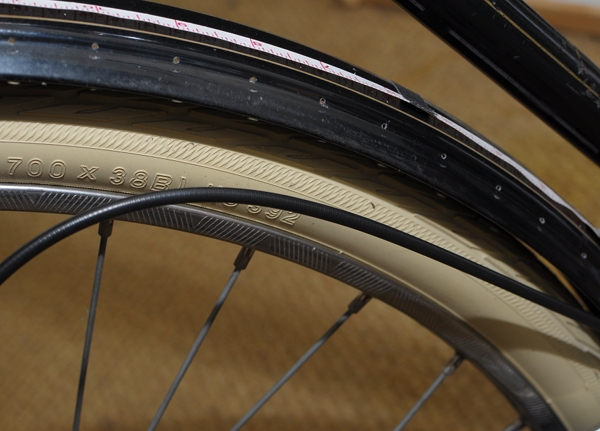
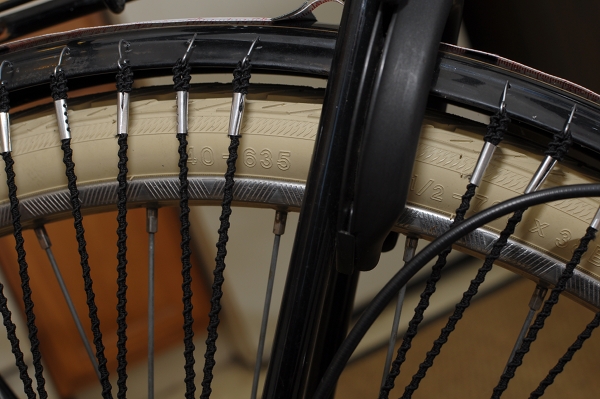
If you measured correctly, the holes should look fairly even - but if not, don't panic. These things are meant to have a hand-made look to them and are forgiving of small mistakes.

Inserting the hooks into the holes is fairly straightforward. One additional step to consider, is leaving room for the "cafe lock" if your bicycle has one. This should be done at the time you are measuring for holes in the first place.
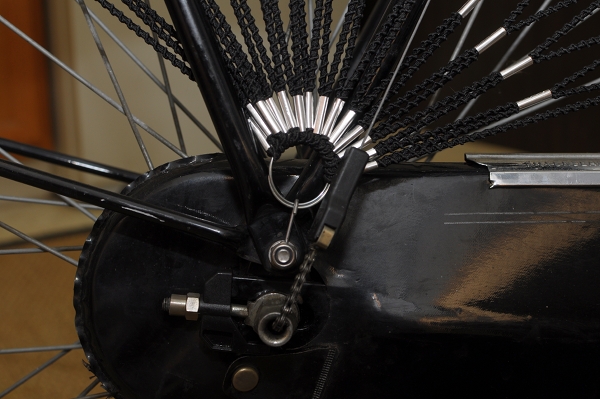
At the drop-outs, the dress guards are typically attached to a bolt using a hook that is provided with the guards. (You will have to remove the nut, then insert the hook, then retighten the nut.) You may have to play around with how you angle that ring to which the cords are attached: The rack stays, the shifter cable and the hub indicator chain may interfere with it, and then you sort of have to angle the ring and insert it over/under, as applicable. Every bicycle is different in this regard, so it is impossible to give precise instructions here.

The important thing, is that in the end nothing sticks out in a way that can catch on your clothing. For example, we crimped the hook on which the ring rests, downward.

And that is pretty much it. Describing the process step by step in itself makes it seem complicated, but it only took us an hour - which I think is good, considering that it was our first time and we were afraid of messing up. You can see the finished installation in an outdoor setting in this post. Looking at the final result, one could say that these guards could look better if they were fanned out over a wider area - but I wanted the coverage to be denser. It's really a personal choice, and I am pretty happy with how mine have turned out. If you own a drill, this method of dress guard installation is worth considering.

Monday, December 27, 2010

15 Years Under the Chaincase

With a blizzard raging outside, what better way to spend an evening than working on bikes?  The Co-Habitant agreed to help with my Gazelle (and by "help" I mean "do most of the work"), in exchange for which I prepared lavish portions of a dish that is sort of a cross between French Toast and a Croque Monsieur - only larger, fluffier, more generous on the cheese, and with some secret herbs that make it special. He likes my cooking, I like his mechanics: win-win! 

Though I bought new tires for my Gazelle months ago, we had been procrastinating with their installation, as it required dealing with the formidable chaincase. Removing it seemed complicated. And who knew what was under there after all these years?

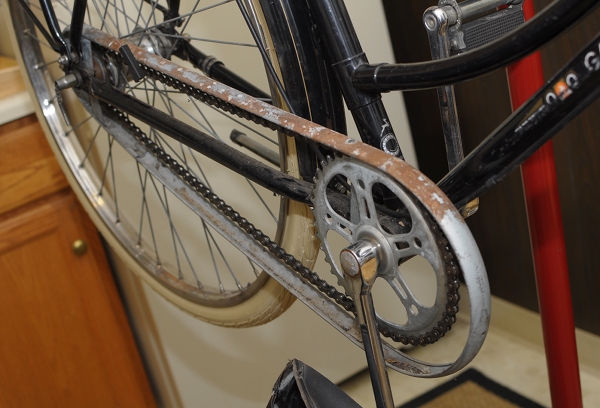
The Gazelle's chaincase is a vinyl casing that is stretched over a metal support structure. It is clipped and fastened at several attachment points - including an amazing system of clasps along the bottom, the likes of which we have never seen before. I am not certain how closely the current-production Gazelle chaincase resembles the one on my 15-year-old A-Touren model, but mine was not exactly easy to remove and install - not a project for beginners at least.

Once removed, this is what was inside. It's entirely possible that the drivetrain has not been worked on since the bicycle was first purchased by the original owner. The metal structure supporting the vinyl casing was covered in surface rust, as were parts of the chain itself. But otherwise, there were no apparent problems. These bicycles were built to be used and abused for years without any need for maintenance. 

We were disappointed to see that the chainring did not have little gazelles carved into it like the older ones did. But I suppose that would be too much to expect from a '90s model. The metal chaincase support structure disassembles into several parts - allowing the rear portion to be removed without taking the whole thing apart.

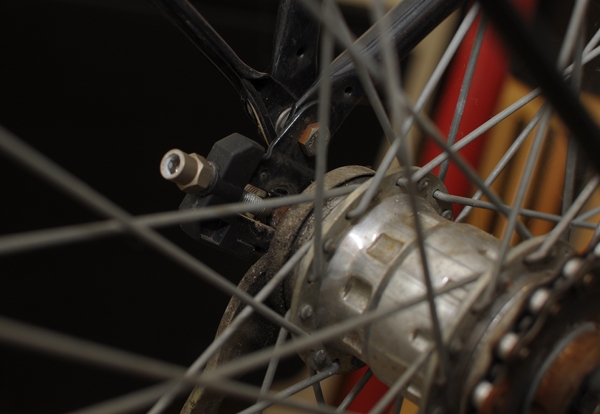
The main chaincase attachment bolt is on the chainstay - a more secure method than attaching chaincases or chainguards to the bottom bracket. Another point of attachment rests on the rear axle. While more difficult to tinker with, the benefit of the vinyl chaincase design, is that it is less likely to rub or knock against the chain. It also weighs less than plastic or metal chaincases - though somehow I doubt that was a concern for the makers of Gazelle.

The Co-Habitant was thoroughly impressed by the design of the Gazelle A-Touren's rear triangle, and believes it to be a better (more integrated) system than that of the vintage Raleigh DL-1 or of the modern Pashley

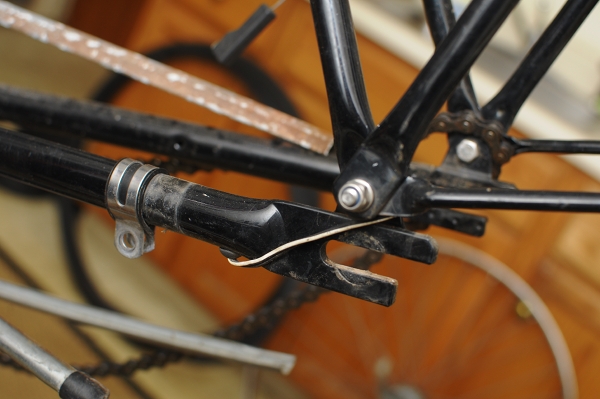
Everything on the Gazelle fits together just so, as if the parts were all custom-made for each other.  And once the chainguard is off, the fork ends are cut in such a way, so as to facilitate wheel removal. The 28" wheels with the stainless steel rims weigh a ton. 

The routing of the tail light is entirely internal: The wiring comes out of the chainstay right next to the fork-end, and snakes along the inside of the rear fender invisibly. These are the kinds of design elements that make this bicycle a fully integrated system - almost an organism - that experiences very few problems. There are fewer things to shake loose, break, or fall out of adjustment, which is what makes it so low maintenance. 

I know that some enthusiasts would have next taken the whole bike apart, scrubbed off the rust, polished the frame and components, and put it back together - but we prefer to let functional bikes be. Having checked the drivetrain, none of the components seemed to be any worse for wear despite some cosmetic degradation, so we just cleaned them up a bit, greased everything, adjusted the brakes and shifter, and closed the whole thing back up. I will replace the chain soon just in case, but that is about it. Changing the tires on this bike was easy, and the cracked originals are now replaced with new Schwalbe Delta Cruisers. We also removed the vinyl dressguards and are replacing them with something more personalised. The snow continues today, but by the time it is over the winterised Gazelle will hopefully be ready for her test-ride. Working on this bicycle has made us both appreciate just how well it was built. I know that the current-production Gazelles differ in the way they are constructed, but I hope that they retained at least some of the ingenuity of the original design. 

Tuesday, November 2, 2010

Location, Lock-ation...

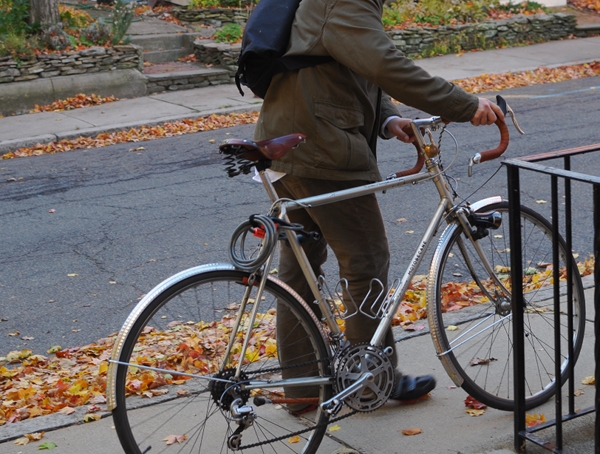
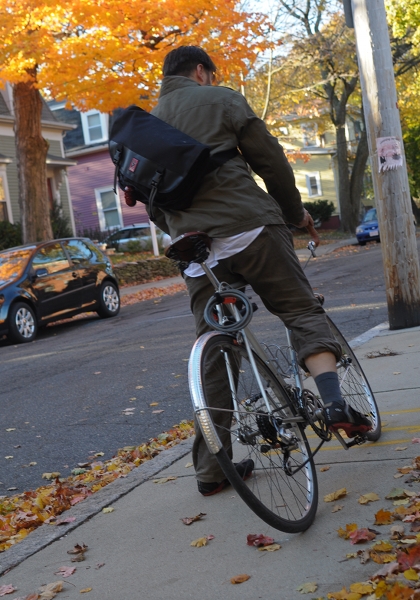
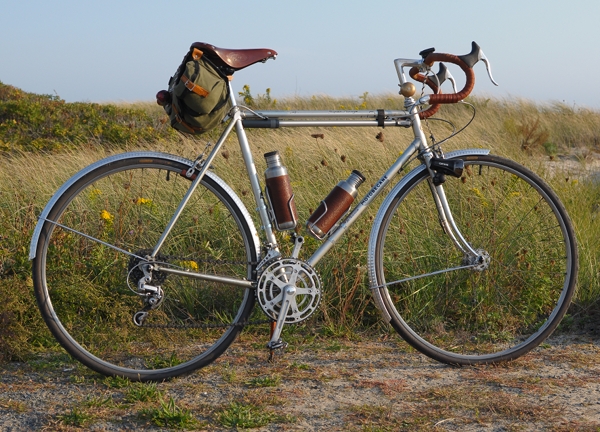
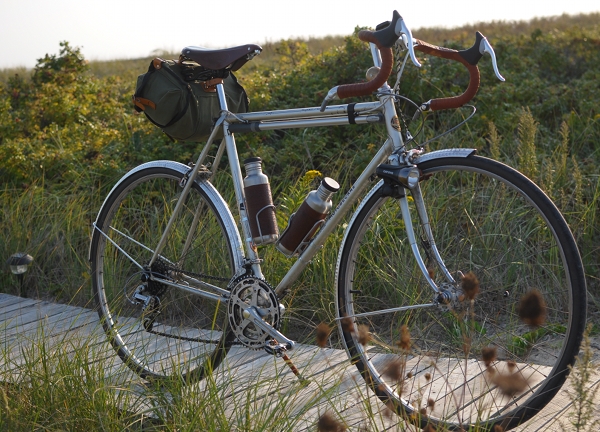
The Co-Habitant started a new job this week, and with it a new commute. The trip is about the same distance as before, but his cycling ritual is much changed. Previously, he rode to work on his fully loaded Pashley Roadster, which he would lock up in the secure bicycle cage inside the building's parking garage. The new job's parking facilities are less secure, and it is in an area where he does not feel comfortable leaving his Pashley on the street all day. So he will now be commuting on his old Motobecane roadbike, which he has stripped down to the bare bones.  This is what Myles looks like in his normal role as touring bike. And above is the new pared-down version: No saddlebag, no twined water bottles, no pump under the top tube. A U-Lock and an extra long cable lock are wrapped around the seat cluster. The battery headlight on the fork is detachable, and the tail light will now be attached to the messenger bag he plans to carry.

The Co-Habitant's response to his new commute underscores the differences in our attitudes toward bicycle security.  His Pashley is a comfortable, upright bicycle and if it were me, I would continue to ride it despite the change of location and the less than ideal parking situation. I would remove the Pashley's luggage, get a detachable pannier for the rear rack, use a U-lock plus long cable combination, lock it up outside and stop worrying about it. But then again, some would say that my own lock-up methods are scandalously lax, because I typically just use a cable lock. In short, the Co-Habitant and I are separate people and often our views on things differ. I respect that he does not want his "nice" bicycle to get stolen, but it just seems like such a shame to ride an aggressive roadbike (with clipless pedals!) to work and carry all his stuff in a messenger bag, when he owns the perfect commuter bike. 

How much of a factor is the location of your job (or residence) in your choice of what bicycle to ride and in your lock-up methods? 

Friday, September 24, 2010

Making an Ordinary Vintage Roadbike Extraordinary (a Review of Sorts)

The Co-Habitant's roadbike, Myles, is a 1976 Motobecane Super Mirage, which he acquired in Spring 2009 and has been gradually updating with modern components and personal touches. It is his only roadbike, and he has cycled somewhere between 2,000 and 2,500 miles on it through its various iterations. I wanted to write a review of it (from my perspective), because I think it poignantly illustrates some aspects of owning and customising a vintage roadbike.

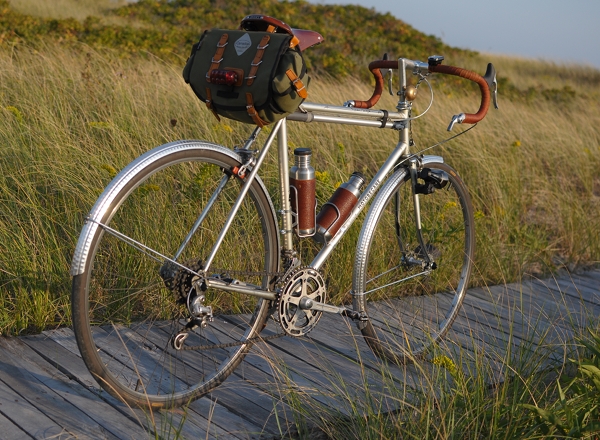
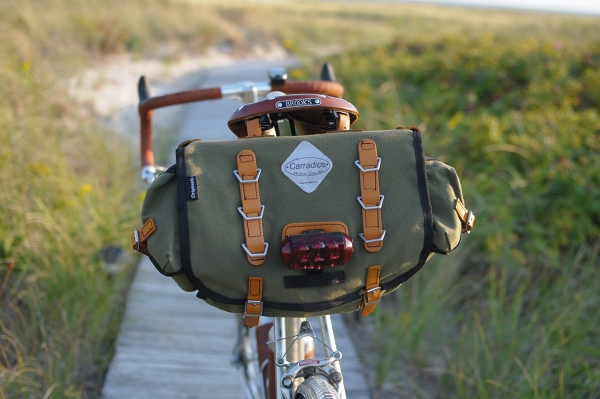
It is always interesting to observe people's reaction to Myles, for he is a real head turner - even more so than my Rivendell. The silver frame, the hammered fenders, the wealth of brown tones in the leather and twine, the frame pump looking almost like a double top tube, and the classic Carradice bag, somehow combine to create a whole that is more magnificent and eye-catching than the sum of its parts.

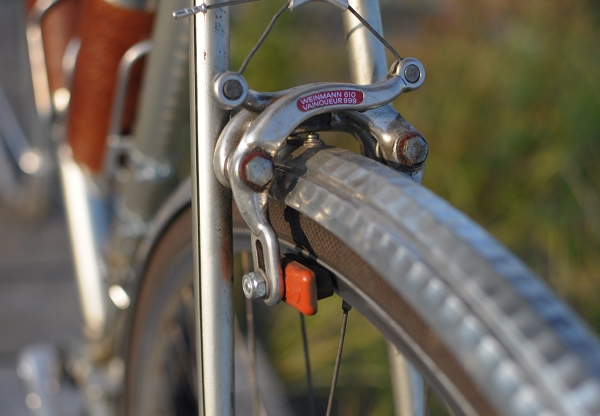
On closer inspection, those who know bicycles typically exhibit one of two reactions. Some are delighted to see a good, ordinary vintage bicycle salvaged and turned into a thing of beauty. Others are bewildered that we bothered to so elaborately refurbish something so commonplace, rather than searching for a frame with a more impressive pedigree. While the Motobecane Super Mirage was a good, solid bicycle in its time, it was decidedly middle-tier and for that reason unremarkable. The frame is hi-ten steel, the lugs are fairly basic, and the original components (Suntour, Weinmann) are pretty good, but not excellent.

We do not disagree with the point of view that a better frame would have been more deserving of all the DIY lavished on Myles. But sometimes a bicycle just evolves organically, and such was the case here.

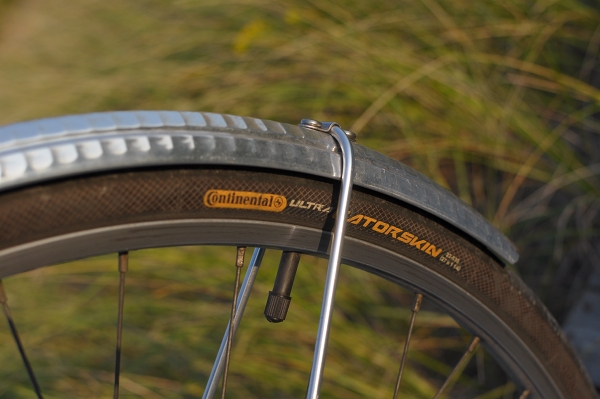
When the Co-Habitant found the bike, used and somewhat abused, the plan was simply to ride it after a few minor changes. He first replaced the tires, after the original ones blew up on his very first ride.  He has ridden these Continental Gatorskins (27" x 32mm) the entire time without incident.

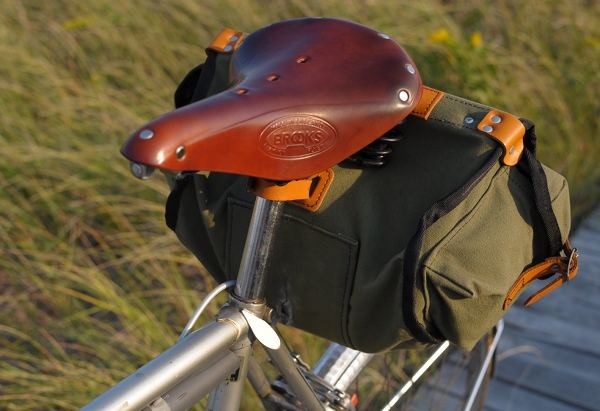
He then replaced the original vinyl saddle with a Brooks Flyer. Early on, he was caught in the rain and the Flyer got wet - which hastened its breaking-in process nicely.

The brakes on the bicycle worked fine after some adjustment, but he did replace the pads with the salmon Kool-Stops.

As he began riding the bicycle more and more, he added fenders and a saddle bag. Although I am normally not a fan of hammered Honjos, I think they do look good on silver bikes - providing textural variation where the colour is similar.  Hammered fenders are also a good investment in terms of hiding dents or scratches.

The Carradice Barley bag has been sufficient for carrying anything he needed on this bike, up to our current trip. For the future, he will consider getting a larger bag that can fit laptops, and a rack to support it. Having a saddlebag is also handy for installing a battery-operated tail light, such as his CatEye.

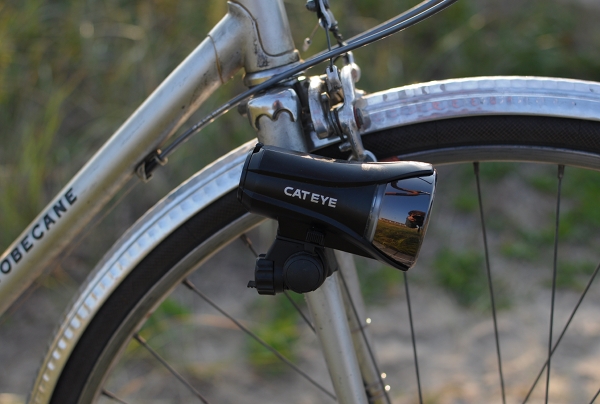
His headlight is mounted on the fork, using a Minoura light mount. While he prefers generator lighting, as far as battery-operated lights go, he likes this system very much.

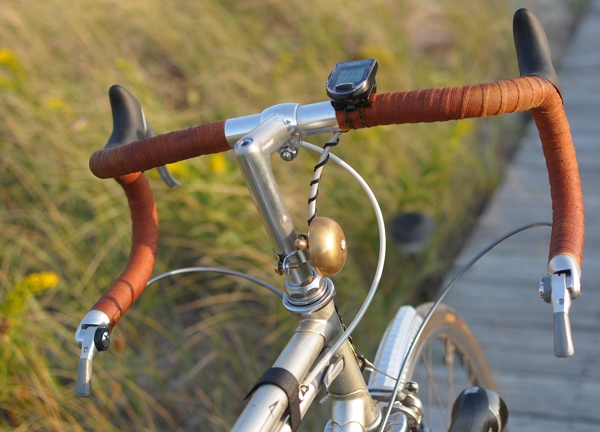
Some months later, he decided to replace the handlebar set-up, as the original one caused discomfort and difficulty operating the brake levers.  He replaced them with 42cm Nitto Noodle bars, which he loves, and the stem with a Nitto Technomic. 

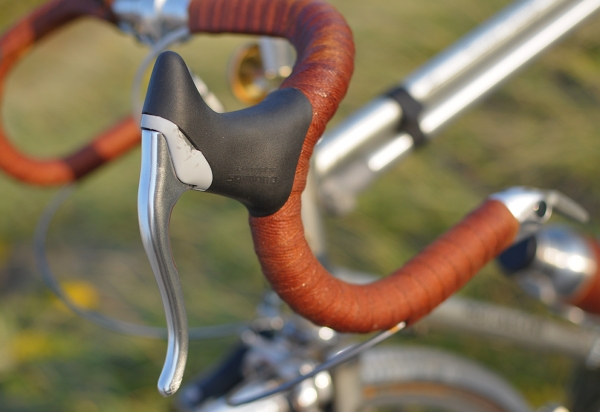
The original non-aero brake levers were replaced with modern Shimano aero brake levers. Personally, I am not a fan of these brake levers, as the hoods have a rather harsh surface and there is a plastic insert that is very easy to damage. The Co-Habitant has dropped and crashed this bike several times, and you can see that the levers look battered.

Almost a year later, a few more changes were made. After complaining that his feet always slipped on the touring pedals at high speeds and that toe clips were a bother, he installed these SPD clipless pedals - much to my shock at the time.  He loves them and now says that he would not go back to non-clipless on a roadbike, vintage or not.

Around the same time, he also installed a CatEye computer to keep track of his speed and mileage,

a Topeak frame pump,

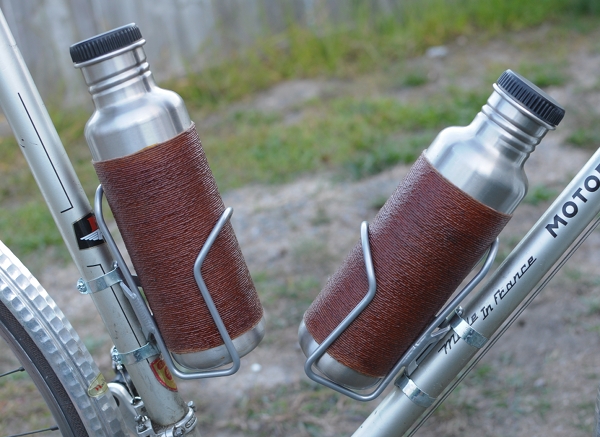
and two bottle cages, bolted onto the frame - into which he places his twined and shellacked Klean Kanteen bottles.

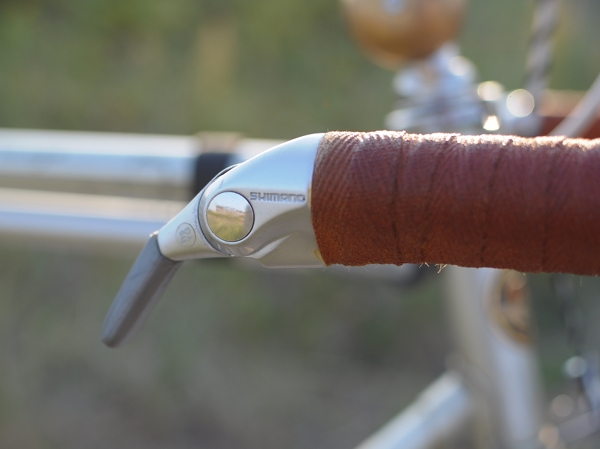
And the final update - completed just a couple of weeks ago in our yard  - was the replacement of the original stem shifters with these Shimano bar-ends. Since the bike is a 10-speed, it isn't possible to get indexed shifting, but these work just as well in friction mode. After having used a shifting method that sounded like a tractor for over a year, the Co-Habitant is absolutely delighted with these - they are fast and quiet, and he is convinced that they are superior even to my Silver shifters (although I disagree).

And so that is the story of Myles's slow but steady transformation from a plain '70s French 10-speed to a glorious and shamelessly eccentric dandy. Was it worth it? It certainly helped the Co-Habitant learn about classic roadbikes - both riding them and working on them. It is difficult to get a straight answer from him about how comfortable the bike is, especially as he is more tolerant of discomfort and pain than I am and to some degree even thinks these are "normal" to experience on a roadbike. But from what I can surmise, the bike is more or less comfortable in its current state, except that it places a bit too much weight on the hands and is over-responsive to the point of being "squirrely". Also, the frame size would ideally be larger, and he could do with better gearing.

All of these comments, however, are made only in response to my direct questioning; he never complains about the bike on his own accord. On the contrary, he is extremely fond of Myles, smiling and shaking his head quietly at any suggestion that such components ought to be placed on a new frame instead.