Showing posts with label DIY. Show all posts

Thursday, January 13, 2011

On Bicycle Maintenance and Limitations

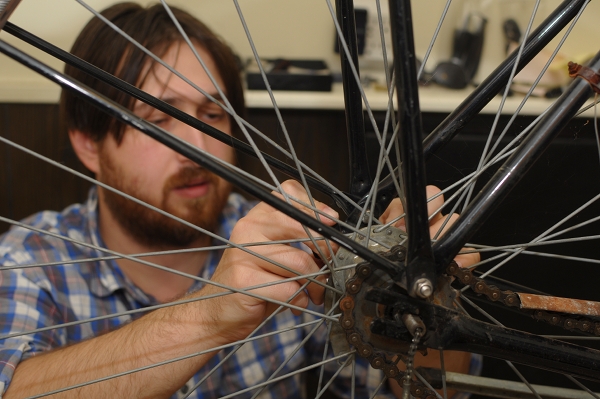
Some food for thought for those who believe that all cyclists must do their own maintenance and repairs: Not everybody has the physical strength for it. I've lately spoken to several persons who have sheepishly admitted this, and were then relieved to hear that I have the same problem. My personal weak point is lack of hand and upper body strength, which can result in difficulties with even routine tasks.  For example, I am not always able to open the quick release levers on wheels. On some bikes it's easy, but on other bikes I simply can't - no matter how hard I pull.  Similarly, tires can be difficult to get off the rim: With some wheel and tire combinations I can work the tire iron until I am red in the face, but it won't budge and the tire refuses to come off. It is frustrating, because with many bicycle repair tasks I can give precise step-by-step instructions to someone else, but just can't physically do the work myself. And it's even more frustrating to watch the Co-Habitant do in 2 seconds what took me 10 minutes of panting not to be able to do.

From the correspondence I get, I know that there are cyclists out there who feel sad when they read unkind remarks on bicycle websites about those who don't do their own maintenance. If bicycle repair is easy for you, that's super. But please keep in mind that it is not easy for everybody. After all, just because knitting and sewing are easy for me, does not mean that everyone who buys their clothes ready-made is "just being lazy." Some people have arthritis, others have a bad back, others still are simply not strong enough - or even not dextrous enough - to work on their own bicycle. In areas where cycling is more common, this is acknowledged as "normal" and people are not expected to repair their own bikes unless they are enthusiasts. But in the US there is often an "oh please!" mentality when a cyclist mentions that they don't work on their own bicycle.

The way I see it, is that it is helpful to be aware of your limitations, and to plan accordingly. If you can't repair a flat, accept it - but be prepared. For instance, only buy tires with good puncture protection, and read reviews about their effectiveness. Know where all the bike shops are in the area where you travel, in case there is a problem and you need support. Know where the nearest subway, train and bus stations are. Carry a mobile phone and a credit/debit card as a matter of course, in case you are stranded in the middle of nowhere and need to call a friend or a taxi to get you.  And most importantly, please don't feel bad if you can't do repairs on your own - you can certainly still ride a bike! We are all good at some things and bad at others, and there is not a thing wrong with that.

Monday, January 3, 2011

Woven Dress Guards for Drilled Fenders

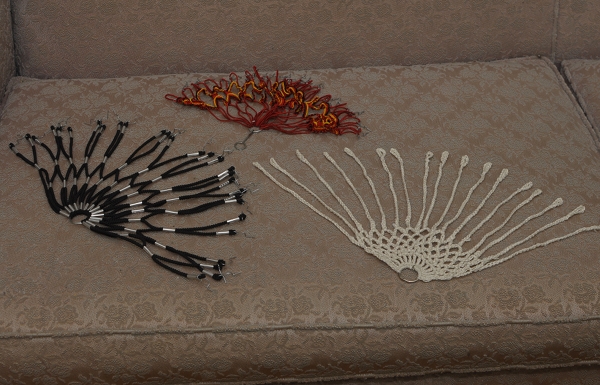
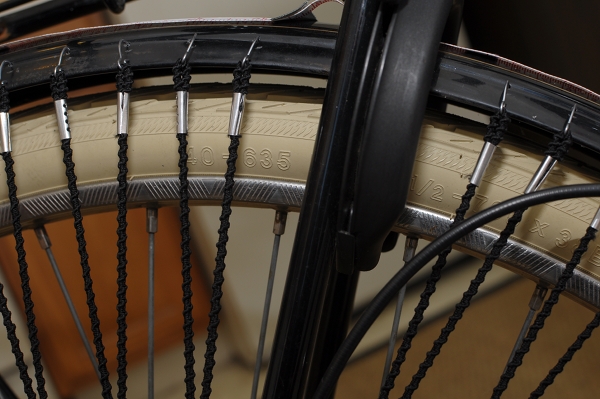
I love the look and feel of woven dress guards. To me they seem more graceful than the solid vinyl type - allowing for the wheel's spokes to remain visible, while still protecting clothing from flying into them. They can also give a bicycle more "personality," as there are many patterns and different installation methods to choose from. A year ago, it was almost impossible to obtain dress guards like these without making them yourself. However, now there are several options available and I have done my best to get my hands on them.

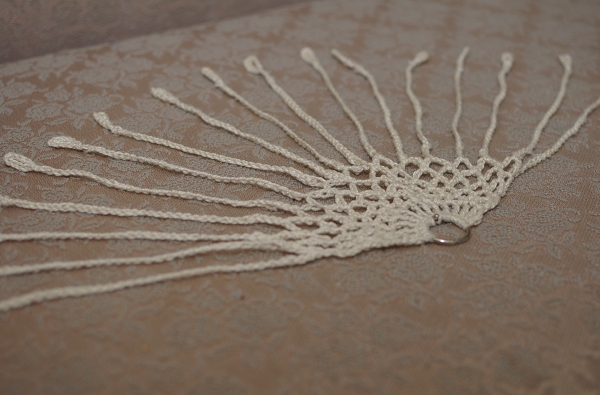
Some of the most beautiful woven dress guards available today are these handmade ones by Bobbin & Sprocket. They can be crocheted in different patterns, according to your specifications (you can see them here on Bobbin & Sprocket's own bike and here on an ANT bike). I ordered a set for my mixte a couple of months ago, but have yet to attach them - because I've decided to do a drilled-fender installation, rather than use the clips provided. The clips don't attach securely enough for my fenders - and I am weary of having the guards fall off and get tangled in my wheel spokes. Earlier, I reviewed the Dutch Simeli dress guards, and clip and fender compatibility was also a problem (they only work on bikes where there is a lot of room between the fender and the tire).

For these reasons, I don't think clipping woven dress guards to fenders is the ideal solution, and suggest the traditional drilled-fender installation instead. I had this done to my vintage Raleigh DL-1 last year, using a simple set of dress guards that a reader had sent me from Portugal. The fancy ones in the picture above were a gift from a friend in Autsria, and are waiting for the right bicycle.

The ones I decided to install on my Gazelle were this set I bought from Mike Flanigan of ANT, who has recently begun to order them from Europe. They are simple, stretchy and durable, and I thought the colour scheme suited my Gazelle nicely.  Drilling fenders for dress guards may seem like a daunting task, but the actual act of installing them is not difficult, if you have a good drill. What's difficult is making the commitment: You can't "undo" the holes in your fender once they are there, and nearly every set of dress guards requires a different number of holes.

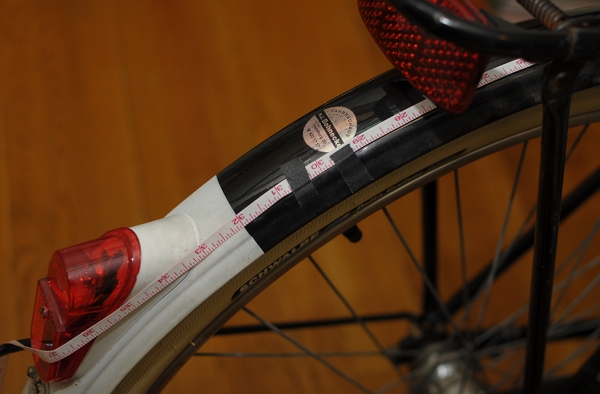
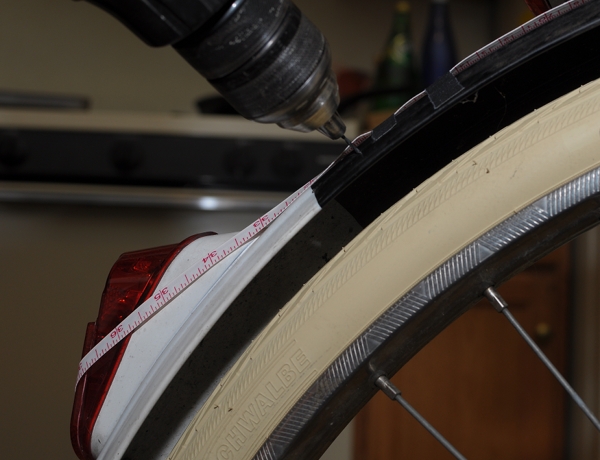
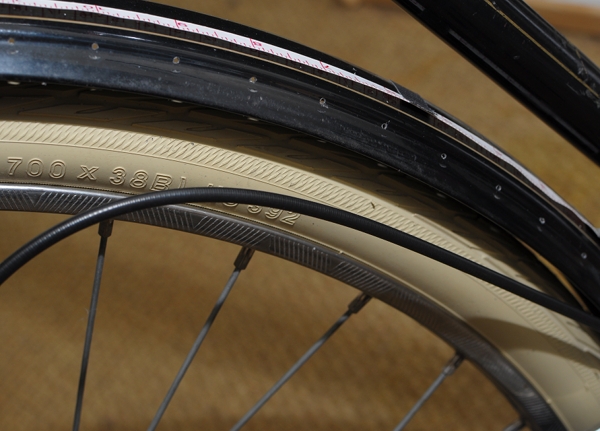
The first step is to consider what part of the wheel you want the dress guards to cover. There is no right or wrong in this regard: If you look at vintage dress guard installations, they are all over the place. Some prefer to cover 1/4 of the wheel, others prefer to cover the entire top half, and others still prefer something in between. Once you choose the coverage area, mark its beginning and end with masking tape. Then, evenly attach a tape measurer along this area. This will allow you to easily mark where the holes are supposed to be. The dress guards I used required 28 holes, which ended up being 1" apart.

Depending on what bike you have, you do not necessarily need to remove the rear wheel or even deflate the tire when drilling the holes. On Dutch bikes and English Roadsters, there tends to be so much room between the tire and fender, that if you insert the drill bit as far inside the drill as it will go, it will be too short to reach the tire after piercing the fender.

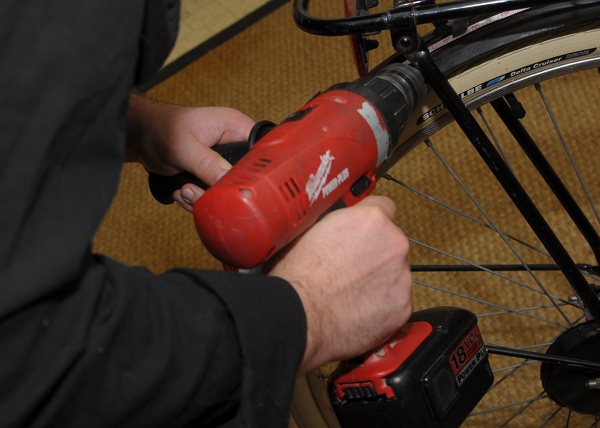
The hooks that come with dress guards are about as thick as medium-sized paperclips, so 1-1.5mm is a good size for the holes. We used a 1mm drill bit.

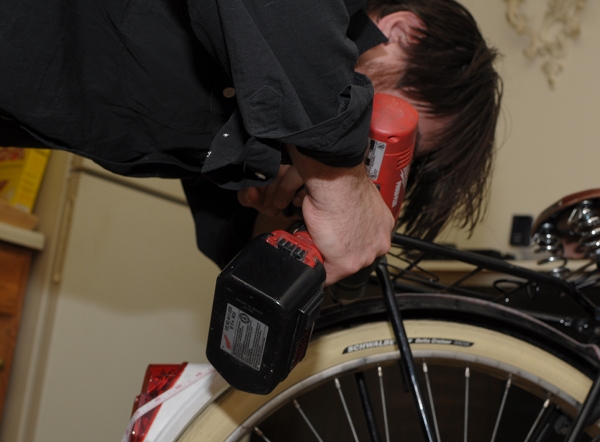
It is good to have a drill with a side handle attachment, as this allows you to keep your hands steady and to have more precise control over the drilling.

I would also suggest using a fresh drill bit and having a spare one before you start, in case it breaks. 

And here we go!

If you measured correctly, the holes should look fairly even - but if not, don't panic. These things are meant to have a hand-made look to them and are forgiving of small mistakes.

Inserting the hooks into the holes is fairly straightforward. One additional step to consider, is leaving room for the "cafe lock" if your bicycle has one. This should be done at the time you are measuring for holes in the first place.

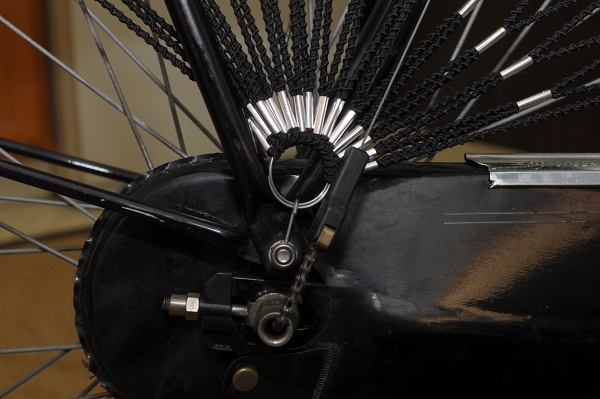
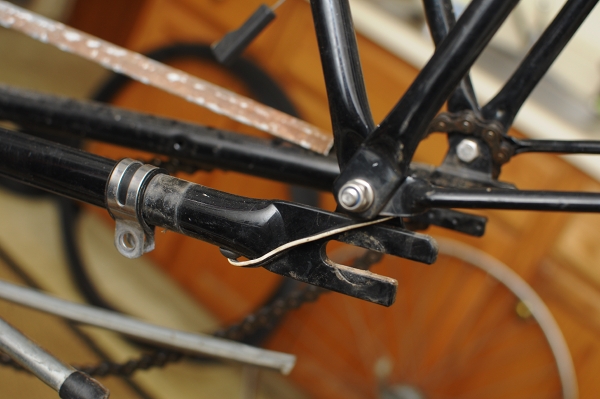
At the drop-outs, the dress guards are typically attached to a bolt using a hook that is provided with the guards. (You will have to remove the nut, then insert the hook, then retighten the nut.) You may have to play around with how you angle that ring to which the cords are attached: The rack stays, the shifter cable and the hub indicator chain may interfere with it, and then you sort of have to angle the ring and insert it over/under, as applicable. Every bicycle is different in this regard, so it is impossible to give precise instructions here.

The important thing, is that in the end nothing sticks out in a way that can catch on your clothing. For example, we crimped the hook on which the ring rests, downward.

And that is pretty much it. Describing the process step by step in itself makes it seem complicated, but it only took us an hour - which I think is good, considering that it was our first time and we were afraid of messing up. You can see the finished installation in an outdoor setting in this post. Looking at the final result, one could say that these guards could look better if they were fanned out over a wider area - but I wanted the coverage to be denser. It's really a personal choice, and I am pretty happy with how mine have turned out. If you own a drill, this method of dress guard installation is worth considering.

Monday, December 27, 2010

15 Years Under the Chaincase

With a blizzard raging outside, what better way to spend an evening than working on bikes?  The Co-Habitant agreed to help with my Gazelle (and by "help" I mean "do most of the work"), in exchange for which I prepared lavish portions of a dish that is sort of a cross between French Toast and a Croque Monsieur - only larger, fluffier, more generous on the cheese, and with some secret herbs that make it special. He likes my cooking, I like his mechanics: win-win! 

Though I bought new tires for my Gazelle months ago, we had been procrastinating with their installation, as it required dealing with the formidable chaincase. Removing it seemed complicated. And who knew what was under there after all these years?

The Gazelle's chaincase is a vinyl casing that is stretched over a metal support structure. It is clipped and fastened at several attachment points - including an amazing system of clasps along the bottom, the likes of which we have never seen before. I am not certain how closely the current-production Gazelle chaincase resembles the one on my 15-year-old A-Touren model, but mine was not exactly easy to remove and install - not a project for beginners at least.

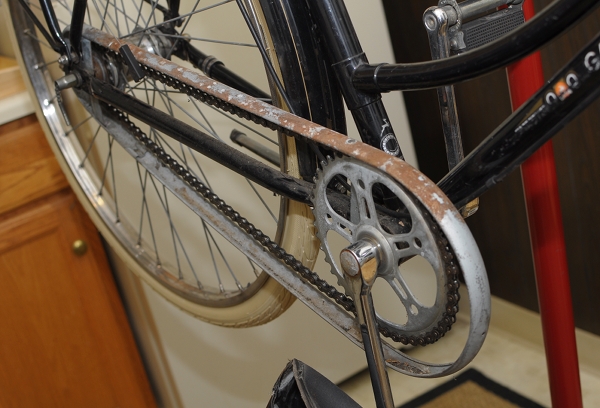
Once removed, this is what was inside. It's entirely possible that the drivetrain has not been worked on since the bicycle was first purchased by the original owner. The metal structure supporting the vinyl casing was covered in surface rust, as were parts of the chain itself. But otherwise, there were no apparent problems. These bicycles were built to be used and abused for years without any need for maintenance. 

We were disappointed to see that the chainring did not have little gazelles carved into it like the older ones did. But I suppose that would be too much to expect from a '90s model. The metal chaincase support structure disassembles into several parts - allowing the rear portion to be removed without taking the whole thing apart.

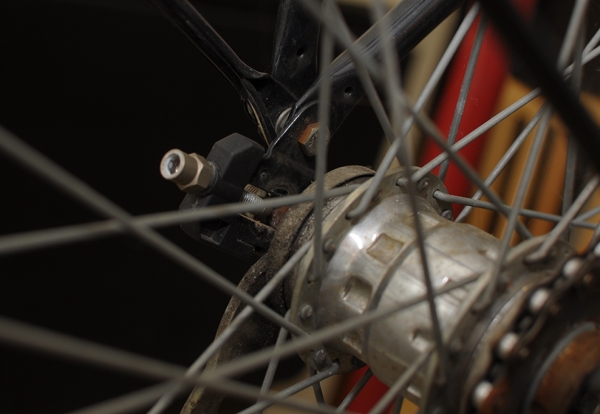
The main chaincase attachment bolt is on the chainstay - a more secure method than attaching chaincases or chainguards to the bottom bracket. Another point of attachment rests on the rear axle. While more difficult to tinker with, the benefit of the vinyl chaincase design, is that it is less likely to rub or knock against the chain. It also weighs less than plastic or metal chaincases - though somehow I doubt that was a concern for the makers of Gazelle.

The Co-Habitant was thoroughly impressed by the design of the Gazelle A-Touren's rear triangle, and believes it to be a better (more integrated) system than that of the vintage Raleigh DL-1 or of the modern Pashley. 

Everything on the Gazelle fits together just so, as if the parts were all custom-made for each other.  And once the chainguard is off, the fork ends are cut in such a way, so as to facilitate wheel removal. The 28" wheels with the stainless steel rims weigh a ton. 

The routing of the tail light is entirely internal: The wiring comes out of the chainstay right next to the fork-end, and snakes along the inside of the rear fender invisibly. These are the kinds of design elements that make this bicycle a fully integrated system - almost an organism - that experiences very few problems. There are fewer things to shake loose, break, or fall out of adjustment, which is what makes it so low maintenance. 

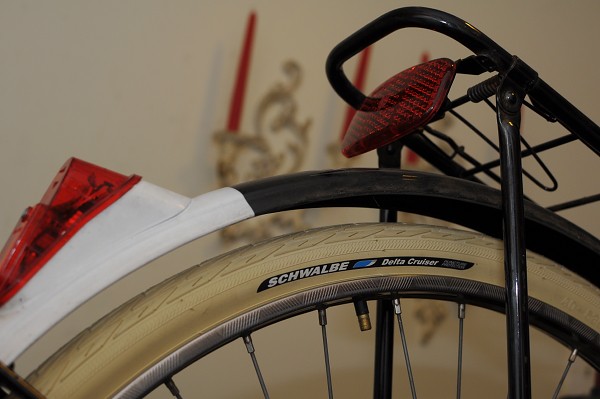
I know that some enthusiasts would have next taken the whole bike apart, scrubbed off the rust, polished the frame and components, and put it back together - but we prefer to let functional bikes be. Having checked the drivetrain, none of the components seemed to be any worse for wear despite some cosmetic degradation, so we just cleaned them up a bit, greased everything, adjusted the brakes and shifter, and closed the whole thing back up. I will replace the chain soon just in case, but that is about it. Changing the tires on this bike was easy, and the cracked originals are now replaced with new Schwalbe Delta Cruisers. We also removed the vinyl dressguards and are replacing them with something more personalised. The snow continues today, but by the time it is over the winterised Gazelle will hopefully be ready for her test-ride. Working on this bicycle has made us both appreciate just how well it was built. I know that the current-production Gazelles differ in the way they are constructed, but I hope that they retained at least some of the ingenuity of the original design. 

Sunday, October 24, 2010

Making a Bicycle Your Own

When getting a bicycle, whether new or vintage, it can be nice to personalise it  -  to make alterations here and there, so that the bike feels distinctly "ours".  I am often asked for advice regarding various aspects of this process, from budget, to component choices, to colour coordination. And while these things are highly personal, there are several general points that I propose keeping in mind.

1. Address functionality and comfort before looks. Prior to buying colourful panniers and covering the bike with flower garlands, make sure the saddle position and handlebar height are properly adjusted for your proportions and postural preference. You may be surprised how much just that factor alone can change the "personality" of the bicycle. And this, in turn, will better inform subsequent aesthetic choices.

2. Personalising the looks of your bicycle need not involve buying lots of costly accessories. Some of the most delightful decorations are also the least expensive. Consider that things like ribbon, faux florals, twine, and stickers can cost mere pocket change. A simple bow in your favourite colour on the handlebars, or some flowers along the edge of your basket, will create an instant, lively transformation.  And if you have an old bicycle with scratched up paint? You could turn it into a "zebra bike", "tiger bike", or "bumble bee bike" by wrapping appropriately coloured electrical tape around the frame to create stripes.

Of course, with an older bicycle there is also the option of using paint. You could try lug outlining, hand-painting small panels, or even painting your own designs along the entire frame. In Europe I see bicycles hand-painted with flowers, polka-dots, zebra stripes, peace symbols, lady bugs, and all sorts of other simple motifs. A paint pen for lug outlining will set you back around $2. Enamel paint will cost around $6 for a small can.

3. Avoid formulaic accessorising. If you saw it in a magazine or on a popular blog, chances are that so did hundreds of others. Do you really want to spend all that money on limited edition saddles, deluxe grips and exotic tires, just to end up with a bicycle that looks identical to lots of other bikes?  Take the time to consider what combination of things would suit you individually, rather than trying to recreate a popular look.


4. Explore ways to trade and barter with other bicycle owners. The components you no longer want might be just what another person is looking for, and vice-versa. This is considerably more affordable than buying everything new, and can yield interesting results. I acquired some of my best stuff via trades, including saddles, dress guards, a rack, and even an entire bicycle!

In the end, the bicycles that are the most striking and feel the most "yours" are those that reflect your personality - regardless of the budget that went into achieving that.

Sunday, October 17, 2010

Autumnal Updates

When I acquired my vintage Gazelle two months ago, I had meant to give her some TLC and a tune-up - but ended up doing absolutely nothing to her until now. She functioned fine despite having sat abandoned in someone's basement, and I've been taking the poor, loyal creature for granted. But every bicycle enjoys care and personalisation, and I have finally given Linda some much-deserved attention. 

The original rubbery-plastic grips must have been reaching the end of their life expectancy, because they felt soft and sticky - as if the material was slowly degrading. So I replaced them with Elkhide sew-on grips from Velo Orange. Although these are not exactly a breeze to install (they are strips of leather that you must cut to size and sew on yourself), the result is worth it - soft, pliant, subtly textured, and beautiful. Luckily, I did not have to destroy the Gazelle grips in the process; with some effort they slid off and I will hold on to them as keepsakes.

I have also outlined the head tube lugs in silver. There was trace evidence that they had once been outlined in this manner and I wanted to restore Linda to her prior glory. I think the outlining goes nicely with the chrome fork crown and the silver headbadge. 

But while these changes are nice enough, the Co-Habitant gave Linda a gift that is even nicer: he "brightened" her headlight by replacing the halogen lightbulb with an LED. This is a temporary solution, before we execute our grandiose plan to overhaul both the head and tail lights with a super bright LED + standlight system, while retaining the original Gazelle casings. It was reassuring to see that DBC did this to their bikes; hopefully our project will be equally successful (if it works, we'll post instructions). But for now, at least I have a brighter headlight - good to have that sorted now that it is starting to get dark so early. 

In addition to the lights project, we are still planning to eventually replace the old, cracked tires with cream Delta Cruisers, and to finally give this bicycle a proper tune up. I am also considering whether I should replace the standard dress guards with something personalised, like the beautiful hand-made guards I've received from Bobbin and Sprocket.  

Linda has been so good to me since I got her, that it is only fair to reciprocate. It's true when they say that one person's trash (she was discarded by her previous owner) can be another's treasure. 

Friday, October 1, 2010

Velophilia and Its Symptoms (and Announcing Dress Guards Recipient!)

Several days ago I offered to give away a set of dress guards, and the rule was for bicycles (not their owners) to post comments about why they would like them. I expected a dozen or so comments from bicycles, but received close to 40... which made me realise that I am by far not the only one to anthropomorphise my bicycles to a point that borders on delusion. And the good news, is that when 40 people share the same delusion, that's called sanity!

[image via Laura B.]

Without further ado, I now announce whom my bicycle Linda has chosen as the recipient of the dress guards: a 1950's step-through Dutch bike named Fanny (pictured above). Here is Fanny's comment:
I'm a Dutch lady, from the mysterious Fanal family, born in the 1950s. I have naked holes running along both sides of my back fender. After reading your post about dress guards, I realized how un-lady-like it has been to leave these dress guard anchors exposed. 
I have recently been working on my appearance--rust removal, new pedals, touch-up painting, pin-striping with a gold paint pen, re-shellacking my grips, etc. It would be so nice to show up at the farmer's market this weekend with a lovely dress guard. The lilac branches in my photo (link below) might have appreciated the guard, too.
Love,  
Fanny, the Fanal
A vintage Dutch bicycle who lives in exile in the US, loves lilacs and has gaping holes in her fender? Linda dabbed at her eyes with an embroidered hanky as she read Fanny's story, and would like her to have the dress guards. If Fanny's human companion Laura B. could please send me her mailing address, the dress guards shall be on their way to her shortly! And thank you everybody for all the bicycle comments on that post; they were hilarious and a lot of fun to read!

Speaking of acute symptoms of Velophilia, I knitted this skirt while convalescing from my hopefully-not-pneumonia. The design is bicycle friendly: It looks like a narrow pencil skirt from the front, but the pointed end in the back allows it to open up while pedaling. I think cycling exclusively on a road bike for the past several weeks has made me crazed with desire to ride an upright bicycle in a skirt again.

And once the skirt was completed, I also realised that my choice of yarn looked a little familiar...

Ah yes, my mixte! My Velophilia is at its most acute when something prevents me from cycling as much as I'd like. Everything I do ends up being about bicycles.  I look forward to returning to Boston later this weekend, hopefully entirely recovered. 

Wednesday, September 22, 2010

Hard Core Bicycle DIY: Is It Worth It?

Over his year and a half of adult bicycle ownership, the Co-Habitant has progressed from not knowing much about bicycles at all, to completing two full bicycle builds from scratch. In the course of that time, knowledge was gradually gained, tools were purchased one by one, and increasingly complicated procedures were mastered. I helped when I could, but mainly the mechanics are his thing. I will stick to writing about it, thank you.

It certainly would be nice to write an inspiring post about what a rewarding and empowering experience it is to do one's own bicycle builds and overhauls. But the truth is, that I do not necessarily believe that to be so - which is why I do not do it myself. Assuming that we are speaking of serious DIY here, beyond simple maintenance, these projects require the investment of considerable amounts of time, energy and money. At the risk of coming across as discouraging, here is how I see it:
It is worth doing your own bicycle mechanics if...

...You truly enjoy it and look upon it as a hobby to fill your spare time with. That is the #1 reason in my view. If you do not enjoy it, the process can be extremely frustrating. Also, keep in mind that like any hobby, this one will require spending money on supplies - some of which will be wasted on trial and error. You will surely ruin cables and cable housing, possibly even components. You will order the wrong parts and will need to return them. Sometimes you will only realise that they are the wrong parts after you try to install them and scratch them up - making returns or exchanges impossible. You will have to make multiple, unexpected trips to bicycle shops and hardware stores for things you will suddenly realise you need. All this better be enjoyable, or it makes no sense.   

...You own multiple bicycles, plan to build up multiple bicycles, and/or foresee yourself frequently changing components on your bicycle(s). Only then does it make financial sense to invest in the many tools you will need to do your own overhauls and builds - and to go through the learning process before you actually get good at it. Things like a proper bike stand and a standard tool kit will already cost more than most bicycle shops charge for a bike build. And then there are the less common, but often necessary tools, such as headset presses, cotter presses, bottom bracket tools, dremels, and so on, that raise the cost of DIY even higher, if you properly account for it all. 

...You are good at bicycle mechanics. If not, then it is just plain dangerous to work on your own bicycle. While some mistakes make for good learning experiences, others - especially when it comes to brakes, steering and the drivetrain - can have disastrous consequences. 

...You are, at least to some degree, a control freak and like everything about your bicycle to be "just so". Sure, a bike shop may do an all right job. But you would just feel better if you trued those wheels or tensioned that chain or installed that bottom bracket yourself. 

If all of the above apply, then by all means - full speed ahead with the DIY. You will enjoy it, and it will be rewarding. However, if your primary goal is to save money, I would suggest you think twice. It is not just about buying all the necessary tools that you may seldom have occasion to use again, but also about time. While on the surface it may seem that I would save money by doing a bicycle build myself, in economic terms this is actually untrue. In the time it would take me to build up a bicycle, I could instead take on an extra freelance project in my own line of work - and the income from it would be greater than the money I'd save by building the bike myself. Financially speaking, the wise thing to do would be to allocate that work to an experienced mechanic while using the time saved to earn money in my own field of expertise.

I am fortunate to live with someone who enjoys working on bicycles (see his description of his travel tool kit!) and is quite good at it. I am also fortunate that he had some time off this summer and actually wanted to spend it working on bikes. Now that he has accumulated all the tools he needs and sufficient experience, we can do pretty much anything bicycle-related at home - and I appreciate that very much. But I by no means think that it is every "real cyclist's" duty to be able to do these things on their own, just like I do not think it is every "real home owner's" duty to be able to do their own plumbing and electrical work. If you are passionate about bicycle mechanics and are good at it, then certainly it can be fun and rewarding. Otherwise, it is best left to the experts - for the sake of your nerves and your wallet. 

Wednesday, September 15, 2010

Shellac: Why and How?

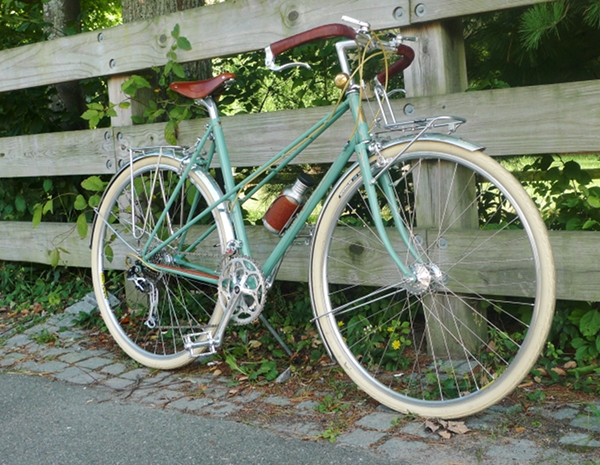
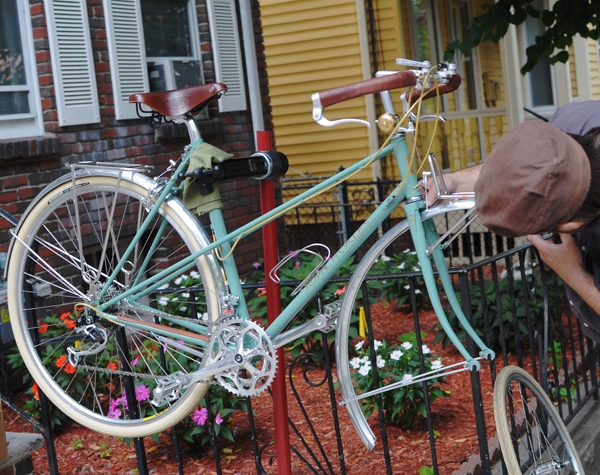
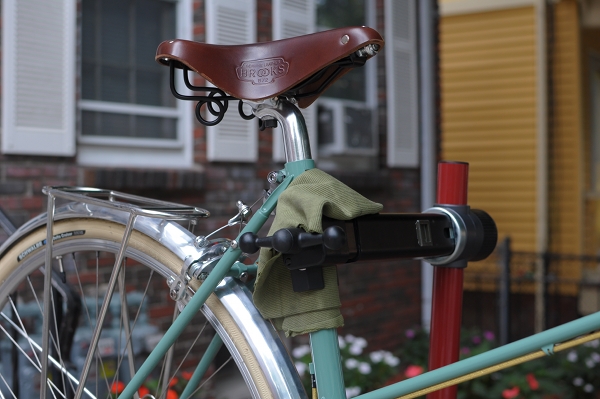
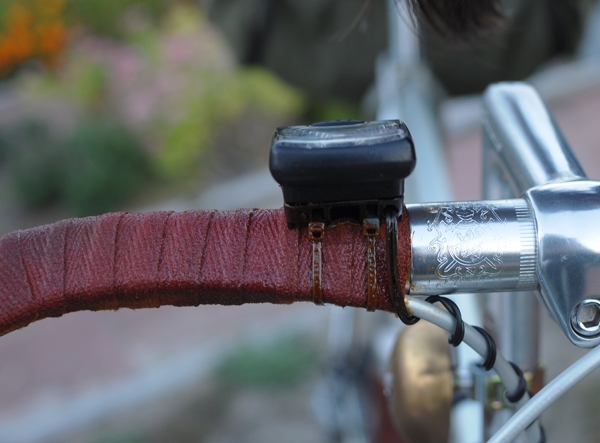
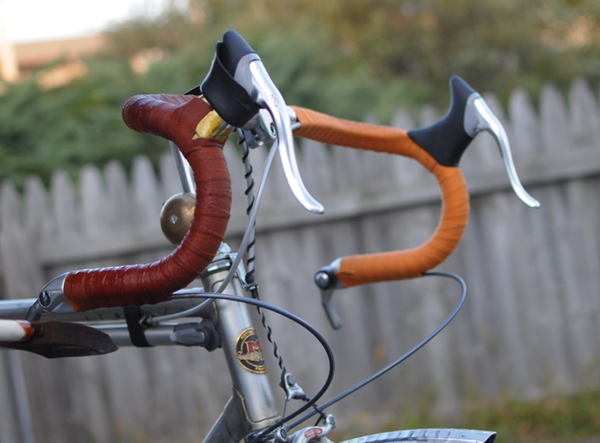
With the rise of the "classic bicycle aesthetic" it is becoming increasingly popular again to shellac handlebar tape, cork grips and twine. Obviously I love the trend. But I also think that people ought to be aware that the purpose of shellacking is predominantly practical, not aesthetic.

Shellac is an all-natural natural sealant (derived from the secretions of a Thai insect), which makes it perfect for waterproofing wood and cloth. When you cover your handlebars in cloth tape, two things will happen to them over a surprisingly short time period:  They will get dirty from your hands rubbing road dust into them, and they will get soggy from rain and sweat - which can cause the tape to distend, discolour, and even rot eventually. Shellac will form a protective layer that will prevent this from happening.

At this point, we have applied shellac so often and to so many bicycles, that we have gone through 3 cans of the stuff in a year and a half. For those interested, here is how I like to do it:

. I use a 1" foam brush, rather than a real paintbrush. A paintbrush can leave visible brush strokes, whereas a foam brush makes it easy to quickly put down an even coat. Also, because shellac is difficult to wash out, it is pretty much a given that you will ruin paintbrushes with it. Ruining a foam brush is less costly.

. I like to apply shellac in thin layers, rather than oversaturating. This way it dries faster, and I have better control over the thickness.

. Because I like to feel the texture of my bar tape, I am careful not to go overboard with the shellac application. If you apply so much that your bars feel glassy and hard as a rock, they might not be so comfortable to hold. If you find that you've accidentally done this, try going over it with steel wool or fine grade sandpaper to restore some of the texture.

. Since I ride my bike often and in bad weather, I re-shellac on a fairly regular basis. The shellac tends to wear off first in the spots where I keep my hands the most. When I notice this, I know it is time to add another thin layer.

. Shellacking the night before I plan to ride the bike usually leaves sufficient drying time - but doing it at least 24 hours beforehand is safer. Once or twice, I've ended up holding my hands on the hoods during an entire ride, because the bars were still not 100% dry.

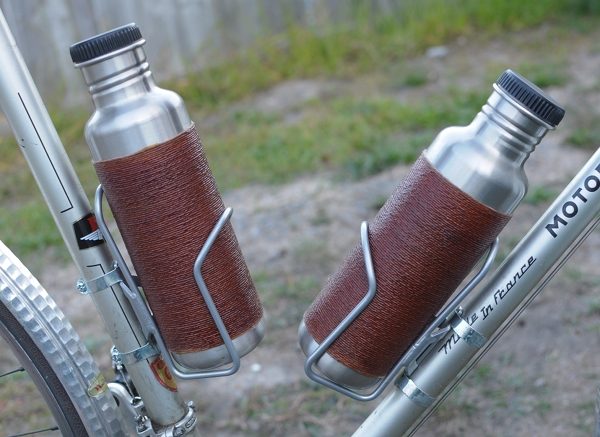
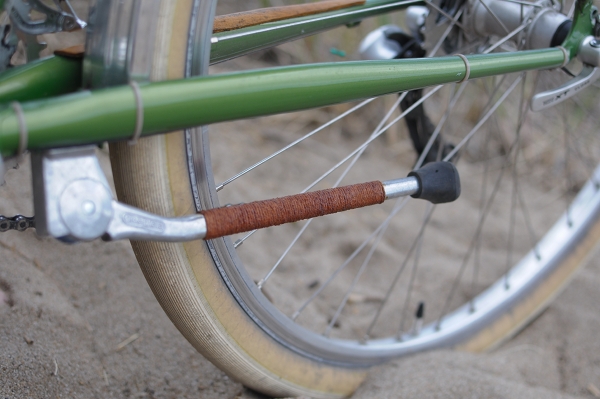
Twine requires shellacking for similar reasons as bar tape: If left in its natural state, it will unravel over a short time period from friction and moisture.

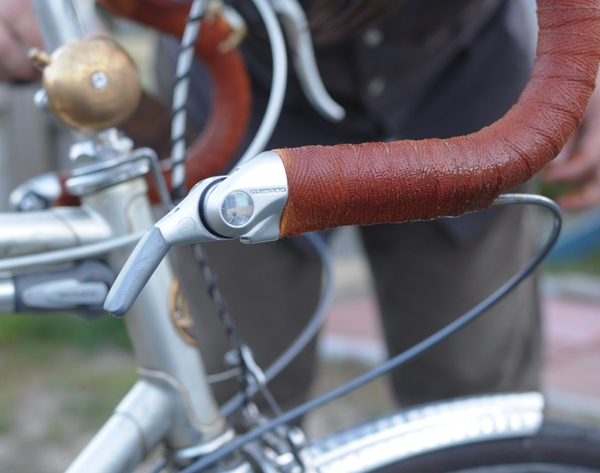
Because of their distinct look, it is understandable that shellacked tape or twine on a bicycle can be seen as a fashion statement. But while I am happy it looks nice, for me the practical benefits far outweigh this aspect. If it were not for shellac, I would destroy my cloth tape on a regular basis. And in case you are wondering - Yes, of course we brought shellac to the Cape! The Co-Habitant has finally replaced his Motobecane's stem shifters with Shimano bar-ends, and we re-did his tape as the sun was setting over the beach next to our house.