Showing posts with label handlebars. Show all posts

Monday, November 22, 2010

Colour Theory for Bikes

As someone who deals with colour all the time - taking pains to get it "just right" for paintings and photography setups - I am fascinated by the role of colour in bicycles. Choosing colour is not just a matter of "what matches what." It is a matter of understanding the psychological mechanisms involved in human colour perception and processing - which to me has always been interesting. But taking it down a notch from the realms of art-speak and neuro-psychology, here are some thoughts on colour choices as they pertain to setting up bicycles:

Handlebars and saddle
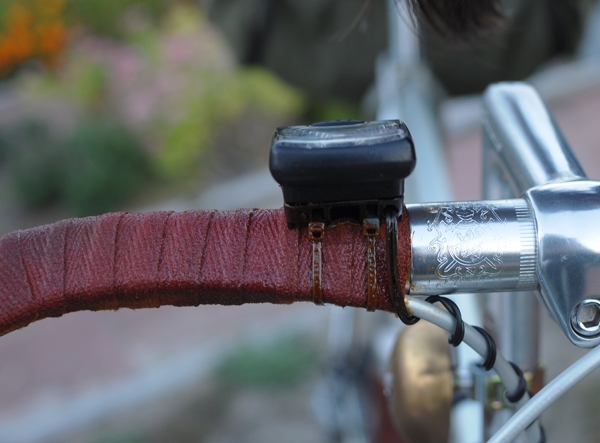
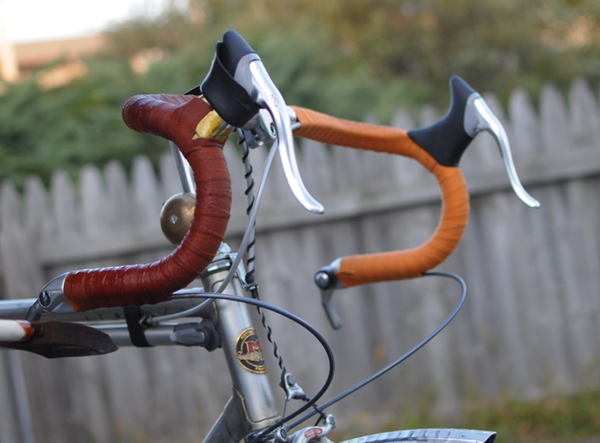
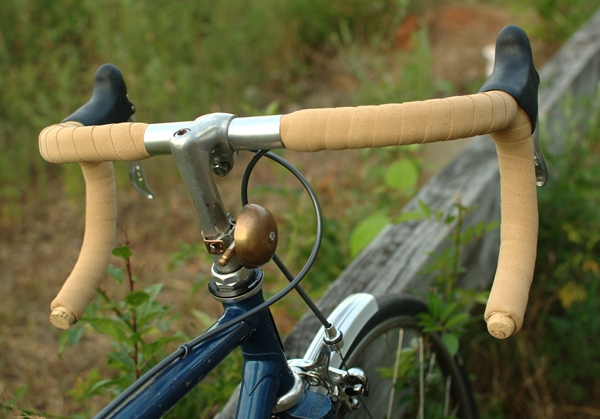
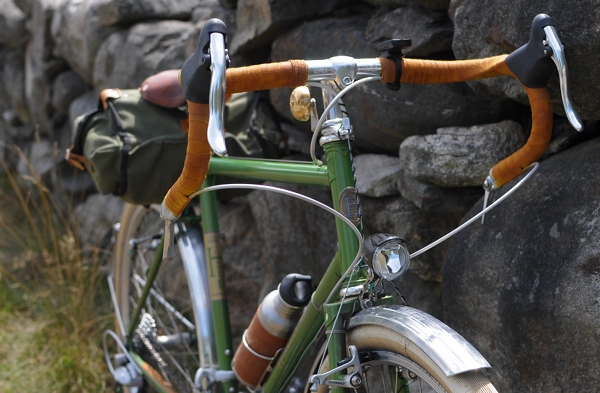
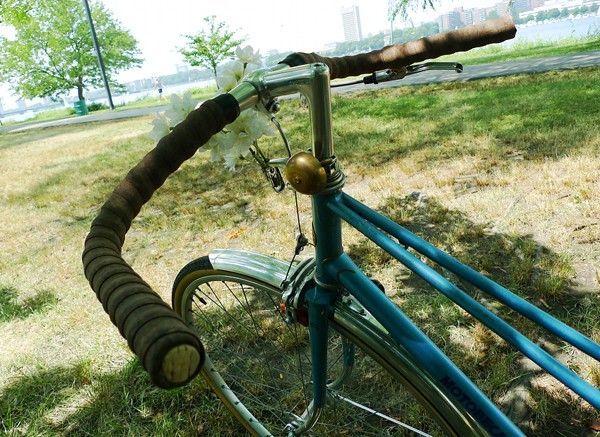
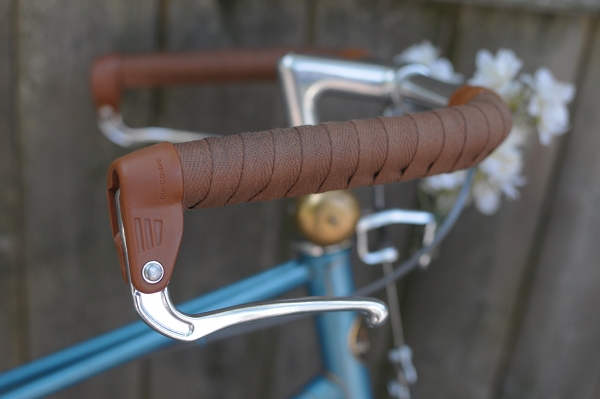
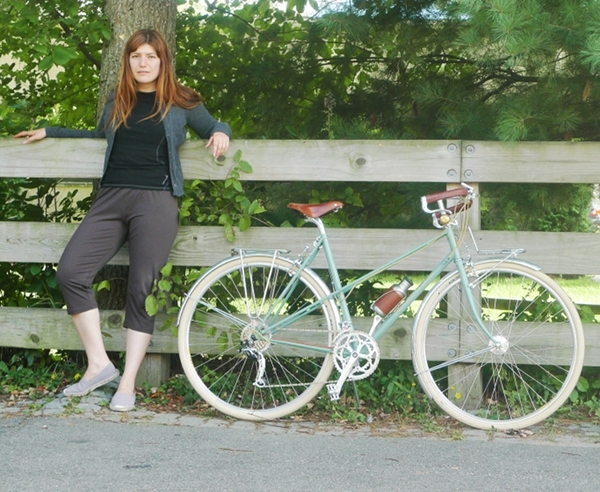
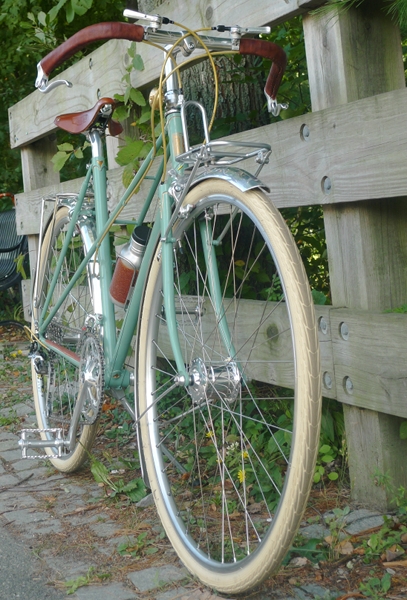
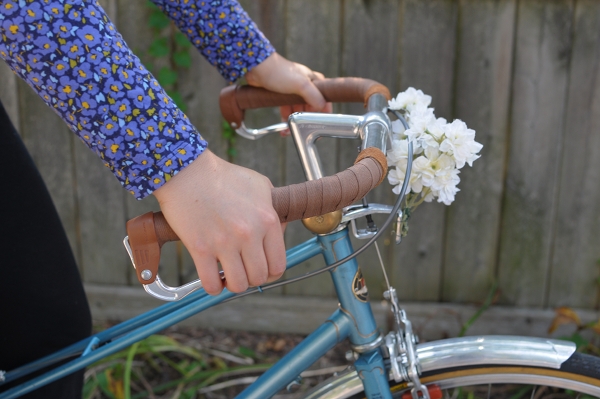
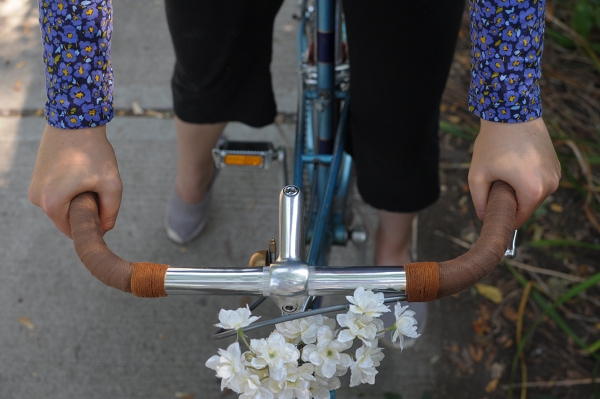
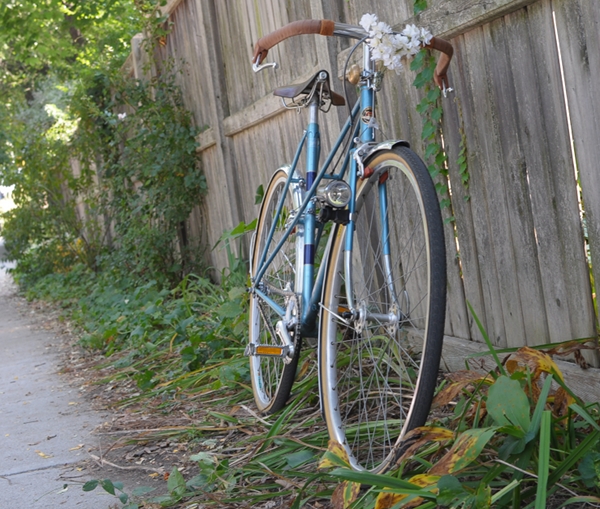
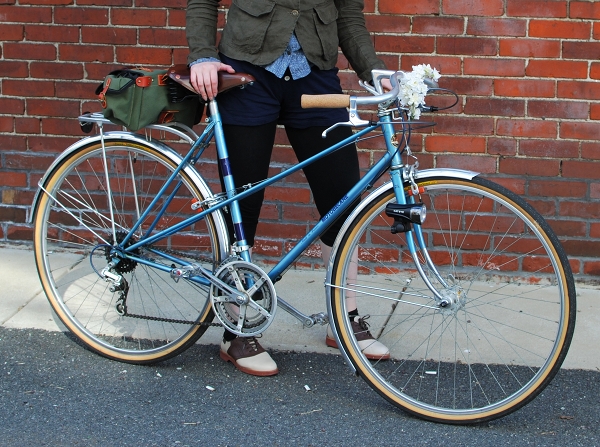
My go-to standard for handlebars and saddles is the brown family. The reason I like to use brown as opposed to black, is that brown enhances the colour of the bicycle frame, whereas black tends to "deaden" it. Being neutral, brown will not compete with the frame colour, just as black will not. But it will make the colour more vibrant, more emphatic - whereas black will leave it flat.
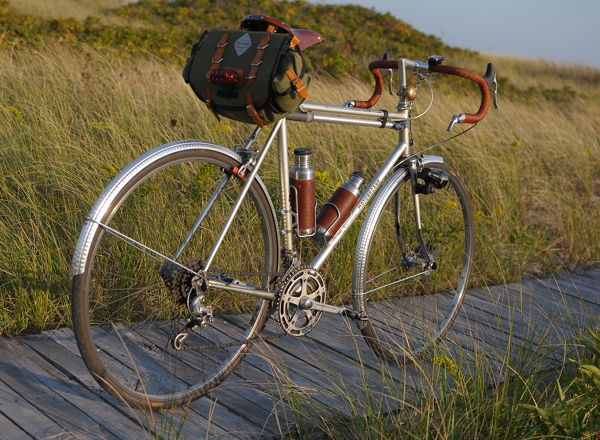
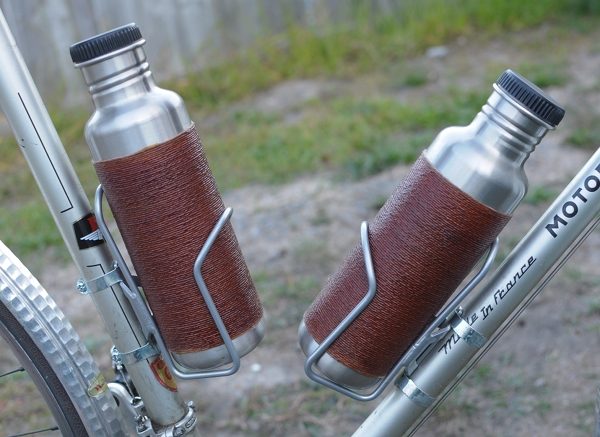
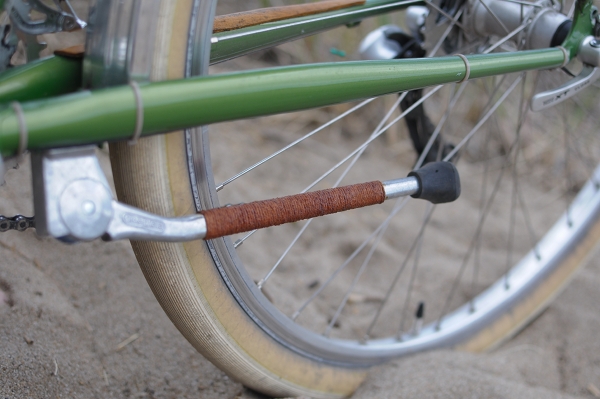
This works especially well on "cool" frame colours - such as blue and silver. And using twine and bits of leather on other parts of the bike (chainstay protector, kickstand, waterbottle, saddlebag straps) will further enhance the "warming" effect.

Brown can also make a black frame look less intimidating and more "personable" - as well as bring out the details in what would otherwise be an expanse of black-on-black.

But of course, black has its place as well. Black accessories make a bike seem more aggressive - which can look good on some bicycles. And depending on the "personality" of a particular bike (lady's military bike?), you might not necessarily want the frame colour to be overly vibrant.

And when it comes to racing bikes, an aggressive or sporty look is usually more fitting than an "earthy" look. This can be achieved either with black, white, or brightly-coloured saddle and tape combinations (ideally in a contrasting colour to the frame). Bright and high-contrast colour schemes are exciting and suggest high energy, fast movement. If that is what you want your bike to communicate - go with it. And if not, you can tone it down with browns and neutrals, as I have done to this bike.
Tires
It goes without saying that performance and not colour should be the first consideration when it comes to tires. But assuming that you can get equally well-performing tires in a variety of colours, it can be nice to play around with that element as well. While I do not hide my crazed preference for cream tires, I do not suggest that they are "the best" option.

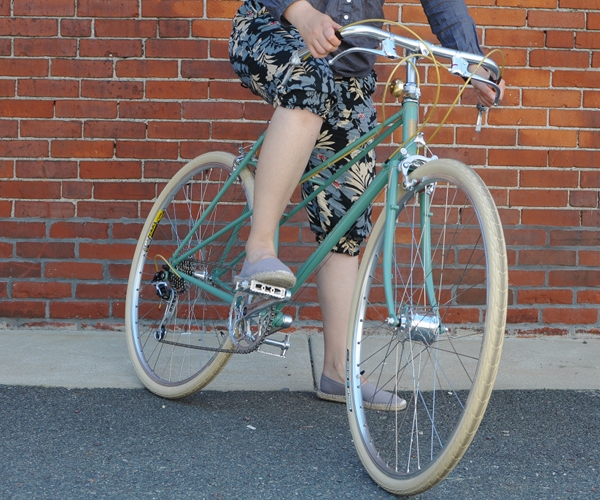
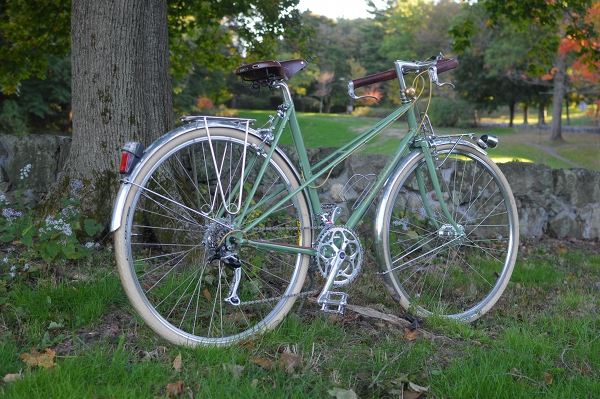
Cream tires can look elegant if you are going for a delicate look and have taken pains not to include any black on your bike. Here they make the bicycle look a lot more "serene" than had I used other tire choices.
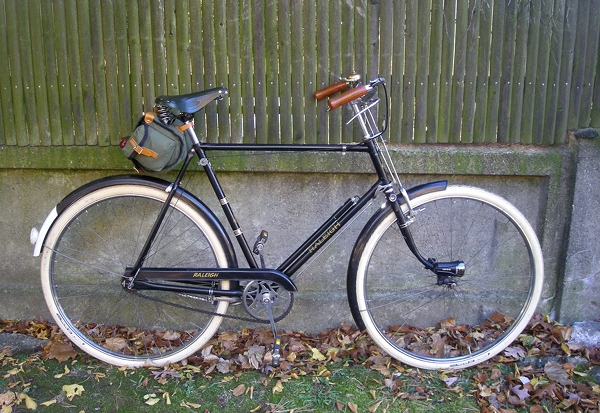
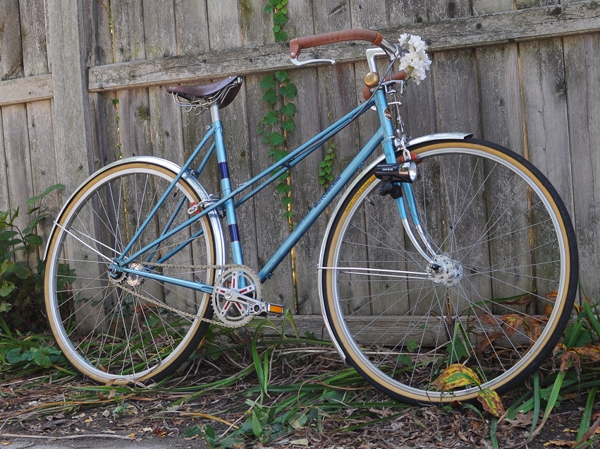
And they can also look elegant as a contrast to the frame. But there comes a point - and for some it arrives much sooner than for others - where cream tires can be just too much and overwhelm the rest of the bike (I think that here I am dangerously approaching that). I also don't think that cream tires look good on a cream or white bicycle. It is too low-contrast and reminds me of "ghost bikes." Achielle does the cream-on-cream look better than others, and if you go in this direction adding prominent brown accessories to break it up a bit is the key.

A good, traditional option if you are looking for classic tires, are "gumwalls" - which are tires with back tread but tan sides. The tan fits nicely into the "organic" saddle and handlebar colour scheme, without the tires competing with the rest of the bicycle for prominence. I also like it how the alloy rims, the tan sidewalls and the black tread create the visual impression of 3 circles, one inside the other.

Bags and accessories
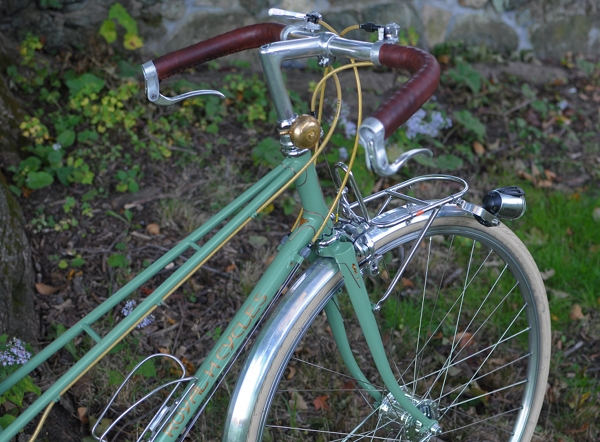
I am very conservative when it comes to bicycle "luggage," so perhaps I am not the best person to ask about this one. Mainly, I don't like it when bicycle bags are too distinct in relation to the bicycle itself - whereas the trend now (especially for accessories targeted at women) seems to be brightly coloured luggage with prominent graphics. It's not that I am "against" flowers, polka-dots, curly-cues, and the like. It's more that I want my bicycle to be the main focal point and not the bag. So I prefer to get subtle, classic accessories in neutral colours. As with saddles and handlebars, I think that the brown/olive family works well for a nature-exploring sort of look, whereas black works well for a more aggressive or racy look.
Decorations
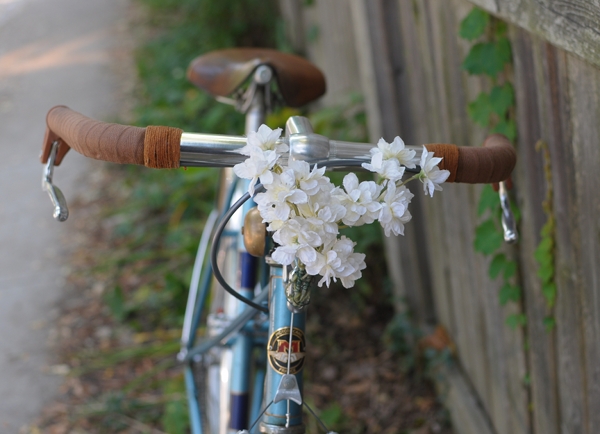
Unless intentionally using decorations to distract from the rest of the bike, the colour of the decorations should not stand out too much from the other colours on the bicycle. Otherwise, the eye will get drawn to the decoration itself, with the rest of the bike an afterthought.
Frame Colour
If you are getting a bicycle frame re-painted, or are trying to choose a colour for a custom bike, the colour selection is of course a matter of personal preference. But based on my own experience (and conversations with others), keep a few things in mind:

1. Speaking very generally, super-bright colours work better on sporty bikes, whereas subdued colours work better on touring and transportation bikes.

2. True white is very harsh and almost never looks good. Even if a bicycle you like appears white to you, the actual colour is almost definitely a pale cream, a very light gray, or an off-white. Think twice before asking for a true white paintjob.

3. If you are getting the paintjob (especially powdercoat) done at a "budget" type of establishment, beware of asking for metallic colours. They are easier to mess up, and flaws in them are more visible than with regular colours. Flaws in lighter colours are also more visible than flaws in darker colours.

4. Prepare yourself for the fact that the colour never, ever looks the same on the bike as it does on the tiny colour chip, let alone on the online colour sample. I have seen some pretty amazing discrepancies, where after the person spends a month wringing their hands about the "perfect" shade, the colour on the bike does not even look like the same colour family as the chip they chose. One thing you can do, is give the painter a sample of the colour you want and ask them to find the closest match. They have experience with the way the colours actually looks on a bike. Alternatively, you can find out the colour code of a bike you like, and ask for that exact one.

There are those who take bicycle aesthetics very seriously and start to pull their hair out in despair if they cannot find the exact shade of orange handlebar tape they wanted. And there are those who could not care less about the details, and just use whatever components and accessories are available. I see myself as somewhere in the middle, leaning perhaps just a tad towards the former. (What? You think it's more than just a tad?...) While I enjoy setting up my bicycles in a way that is aesthetically pleasing to me, I do it quickly and intuitively, without dwelling on it too much. Then I ride the bike and get it filthy beyond all recognition - which is part of the fun, at least for me.

Saturday, November 13, 2010

Pulling the Trigger vs Doing the Twist: Thoughts on 3-Speed Gear Shifters

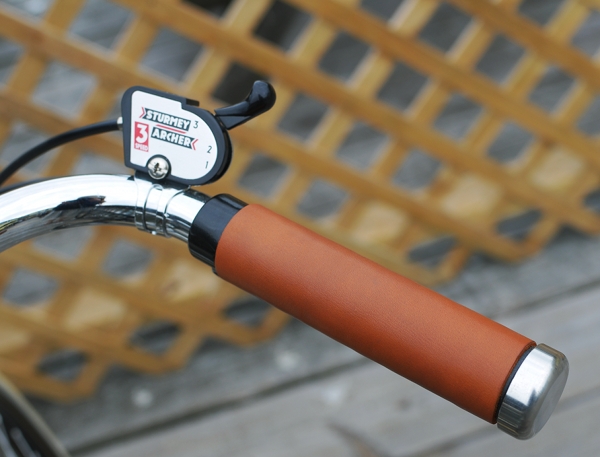
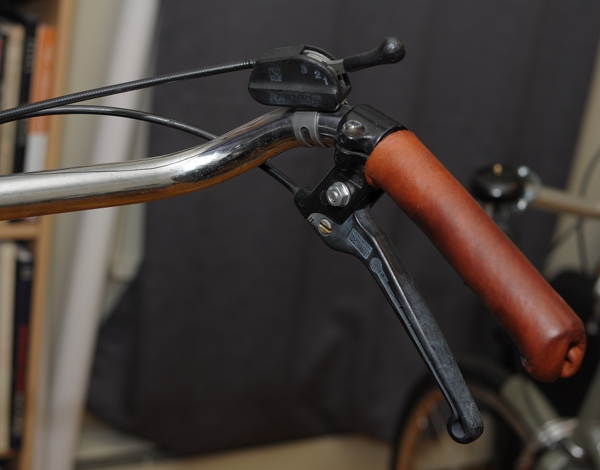
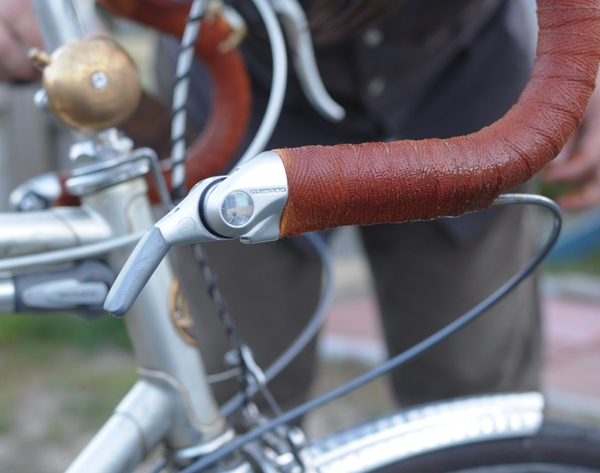
On bicycles with internally geared hubs, we typically see two types of gear shifters. The trigger shifter (pictured above) is a small gadget with a lever that is moved up and down. Today, this style of shifter usually accompanies Sturmey Archer hubs (though in Europe I have seen some lesser known models as well).

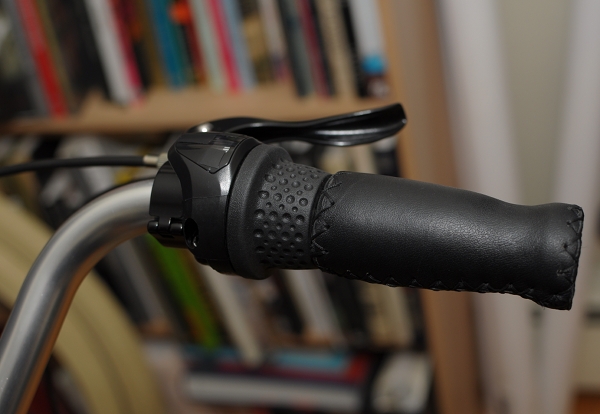
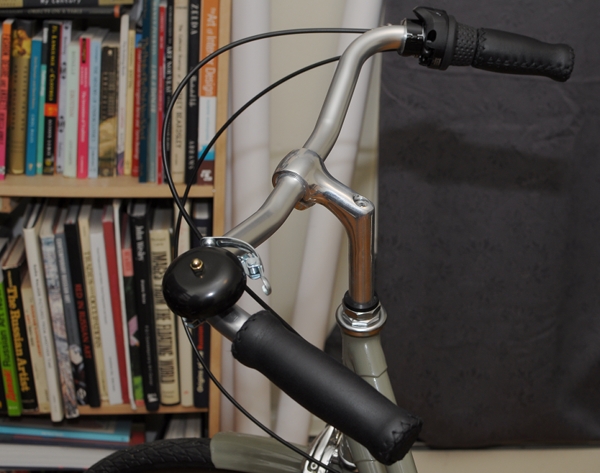
The twist shifter (pictured above) is a plastic and rubber enclosure that is built into the handlebar grip itself. To switch gears, you grab the rubber part and twist forward or backward. This style of shifter usually accompanies Shimano hubs.

After using both types of shifters on various bicycles I've owned to more or less the same extent, I have developed a strong preference for trigger shifters. When I tell people this, they tend to assume it has to do with "vintage aesthetics" - but actually, it has to do with comfort. A trigger shifter takes up very little space on the handlebars, as it is attached with a narrow bracket. This means that the shifter does not interfere with the gripping area, and allows me to install full-length grips on the handlebars.

By contrast, having a twist shifter installed effectively cuts your gripping area in half. Notice that the right handlebar grip on the Bella Ciao above is shorter than the left grip - necessary in order to make room for the shifter. Granted, you can also keep your right hand on the rubber portion of the shifter itself - but it's not very comfortable, especially as there is a tactile break between where the real grip ends and the shifter begins.

But why is it important how long your grips are, as long as you are able to fit your hands on them? The reason, is that having room to move your hands around on the handlebars, even a little, can be essential for hand comfort - especially on long rides. If you ride your bicycle for just a couple of miles or so at a time, then you might not get the urge to move your hands around. But the longer your ride is, the more fatigued your hands will get if you keep them in the same position. Some people are more sensitive to this than others, and those who have nerve damage in their hands (like yours truly) are particularly prone to it. The feeling can range from numbness, to "pins and needles" to a more severe sensation of electric current running through the hand. It is not good to experience this problem, and having room on the handlebars to move your hands around allows you to avoid it. Long grips can also help you switch between a more relaxed and a more aggressive position on your bike (by holding the grips further forward or further backward) - giving you some added control over speed.

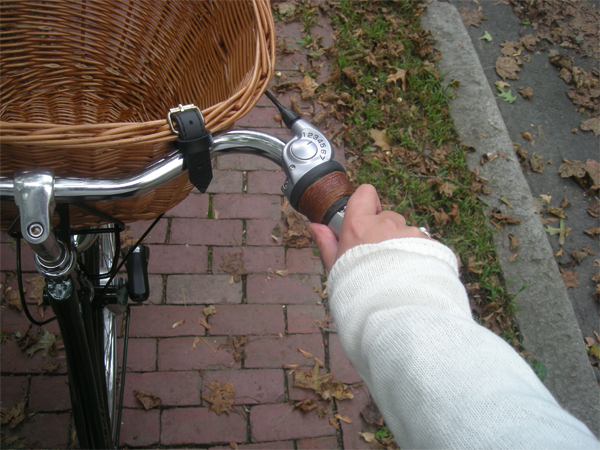
Getting back to shifter styles, here is my right hand on the shortened grip that is integrated with the twist shifter on my Bella Ciao. As you can see, my hand covers the entire grip, with no room to move around - unless I place it on the shifter itself, though even then it is limited. And I had the same problem with this shifter on my previously-owned Pashley, which came with the 7-speed Shimano hub I innocently selected.

On the other hand, here is my hand on the grip I installed on my Gazelle. As you can see, there is room for another handful - which is only possible because of the trigger shifter.

I will note that one benefit of the twist shifter, is that it is more integrated with your hand position - which can be a plus if you switch gears very frequently. But on bicycles with internally geared hubs - especially 3-speeds - I have found that I tend to stay in one "ideal" gear most of the time, switching to a lower gear only when going uphill, and switching to a higher gear only when cycling very fast or downhill. Having to reach with my finger to pull the trigger has not caused me any inconvenience in comparison to using the twist shifter. Your experience, of course, may differ.

While I am not suggesting that everybody ought to run out and demand trigger shifters with their 3-speed bicycles, I am hoping that this comparison will provide some food for thought to those who are getting a new bike, or deciding which hub to select with a new build. I would also like to ask whether anybody knows where I can find a trigger shifter that is compatible with a 3-speed Shimano Nexus hub? Even if it involves rigging something up with a "thumbie" derailleur-style shifter, I am up for it. Thanks in advance for any advice.

Wednesday, September 15, 2010

Shellac: Why and How?

With the rise of the "classic bicycle aesthetic" it is becoming increasingly popular again to shellac handlebar tape, cork grips and twine. Obviously I love the trend. But I also think that people ought to be aware that the purpose of shellacking is predominantly practical, not aesthetic.

Shellac is an all-natural natural sealant (derived from the secretions of a Thai insect), which makes it perfect for waterproofing wood and cloth. When you cover your handlebars in cloth tape, two things will happen to them over a surprisingly short time period:  They will get dirty from your hands rubbing road dust into them, and they will get soggy from rain and sweat - which can cause the tape to distend, discolour, and even rot eventually. Shellac will form a protective layer that will prevent this from happening.

At this point, we have applied shellac so often and to so many bicycles, that we have gone through 3 cans of the stuff in a year and a half. For those interested, here is how I like to do it:

. I use a 1" foam brush, rather than a real paintbrush. A paintbrush can leave visible brush strokes, whereas a foam brush makes it easy to quickly put down an even coat. Also, because shellac is difficult to wash out, it is pretty much a given that you will ruin paintbrushes with it. Ruining a foam brush is less costly.

. I like to apply shellac in thin layers, rather than oversaturating. This way it dries faster, and I have better control over the thickness.

. Because I like to feel the texture of my bar tape, I am careful not to go overboard with the shellac application. If you apply so much that your bars feel glassy and hard as a rock, they might not be so comfortable to hold. If you find that you've accidentally done this, try going over it with steel wool or fine grade sandpaper to restore some of the texture.
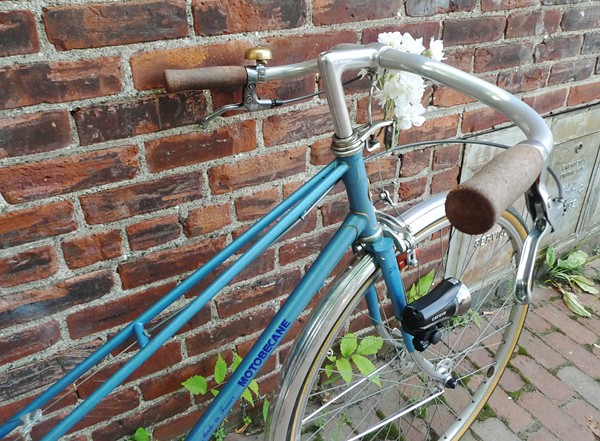
. Since I ride my bike often and in bad weather, I re-shellac on a fairly regular basis. The shellac tends to wear off first in the spots where I keep my hands the most. When I notice this, I know it is time to add another thin layer.
. Shellacking the night before I plan to ride the bike usually leaves sufficient drying time - but doing it at least 24 hours beforehand is safer. Once or twice, I've ended up holding my hands on the hoods during an entire ride, because the bars were still not 100% dry.

Twine requires shellacking for similar reasons as bar tape: If left in its natural state, it will unravel over a short time period from friction and moisture.

Because of their distinct look, it is understandable that shellacked tape or twine on a bicycle can be seen as a fashion statement. But while I am happy it looks nice, for me the practical benefits far outweigh this aspect. If it were not for shellac, I would destroy my cloth tape on a regular basis. And in case you are wondering - Yes, of course we brought shellac to the Cape! The Co-Habitant has finally replaced his Motobecane's stem shifters with Shimano bar-ends, and we re-did his tape as the sun was setting over the beach next to our house.

Monday, September 6, 2010

Cork It or Cloth It?

When it comes to wrapping handlebars, the typical options are cloth tape and cork tape. And my impression is that many, if not most, cyclists today consider cork tape to be more comfortable. On the surface this makes sense: cork is softer, and gripping something soft ought to feel better than gripping something hard. 

However, I generally prefer cloth tape. This tends to surprise people, but here is my reasoning: I feel that the softness of cork tape can be counterproductive, because it necessitates a tighter grip. When I ride a bike with cork handlebar tape it initially feels cushy, but over time I notice that the cushiness is making me grip tighter and my hands grow tired from the exertion. Because cloth tape is firmer, it allows my hands to relax and I am not perpetually squeezing.

Of course, in order for the firmness of cloth tape to work in one's favour, the handlebars must feel comfortable to begin with. The handlebars on my vintage Trek (first picture) have a weird squared-off (rather than tubular) shape to them, which my hands refuse to conform to. So until I can afford better handlebars on that bike, I am using cork tape to disguise the square shape.

Similarly, I always had some form of cork tape or grips on the vintage Motobecane mixte I used to own, because its aggressive geometry would place too much pressure on my hands.

But once I managed to slacken the seat tube angle (with the help of a swept back seat post) and improve the hand position with the Belleville handlebars, holding the bars finally became comfortable and cloth tape felt better than cork tape.

This makes me wonder whether the prevalence of cork tape we see today could generally be a symptom of uncomfortable positioning. Are more cyclists choosing cork tape because their position places too much weight on their hands? And furthermore, has this somehow become normalised in what is now considered "proper bike fit"?

A number of times now, I have been approached by other cyclists and asked how I "can stand" having the handlebars on my Rivendell wrapped in cloth tape, as well as how I manage to cycle without padded gloves. Don't my hands hurt? Well, no. My positioning on this bicycle is such, that I feel no weight on my hands. So the bar tape is really just there to provide a pleasant surface texture to the handlebars, rather than to "fix" any discomfort issues. And isn't that how it ought to be? I am not informed enough to speculate about such things, but I wonder what those who have been cycling since "back in the day" think about the cloth vs cork issue.

Sunday, September 5, 2010

Strange Magic! And a Saddle Conundrum

How on Earth can one bicycle handle like a stately city bike one moment, and like a fast touring bike the next? I have no idea, but I have just experienced it.

At slow speeds, the Royal H. mixte rides like a vintage 3-speed: stable, easy, upright. So nicely it performed as a city bike, that I was almost reluctant to take it on a "real ride" - having gotten used to doing those kinds of rides on road bikes with drop bars. But once out of the city, the bicycle was magically transformed into... I don't even know what, because I haven't ridden a bike quite like it before!

This beauty handled the 40 mile ride through the hills of Concord and Lexington as if it were a casual cruise to the beach. We rode fast, but I didn't feel the speed. We climbed hills, but I didn't feel the strain of the climb.

When wrapped as I have them, the Porteur handlebars offer 3 distinct positions: upright when held at the edges, slightly leaned forward when held further down, and more aggressively leaned forward when held at the corners. And the bicycle responds to changes in hand positions very nicely. The Silver shifters installed onto Paul's Thumbies (more about this ordeal later!) are as easy to use as Sturmey Archer trigger shifters. And my positioning on the bike is so utterly perfect that I feel no pressure on my hands whether I am upright or leaned forward. The ride quality - namely its versatility - is strangely magical. I have never met a bicycle that can go from stately to aggressive at the drop of a hat before.

The mixte is not 100% finished yet, though pretty darn close: We still need to install the lights, and the front rack in these pictures is not the one that will ultimately be on it. But most importantly, I am not sure what to do about the saddle: Because my position alternates between upright and leaned over, it's hard to decide whether a more narrow saddle would be appropriate or a wider one, and whether springs or no springs. In the pictures, that is a Brooks B17 S borrowed from one of my roadbikes - but I am not certain that it feels right on this bike. What saddle do you have on your mixte, and how do you like it?

Thursday, September 2, 2010

French Experiments Continue: Belleville Handlebars and Inverse Brake Levers

Spare bicycle parts, a restless spirit, and a willing "guinea pig" can make for a dangerous combination. In her latest reincarnation, Marianne sports VO Belleville handlebars and Dia Compe inverse brake levers - a practice run to determine how a similar set-up would feel on the Royal H. mixte.

Here are the bars and levers in all of their French glory - on a Motobecane mixte with an Ideale saddle.

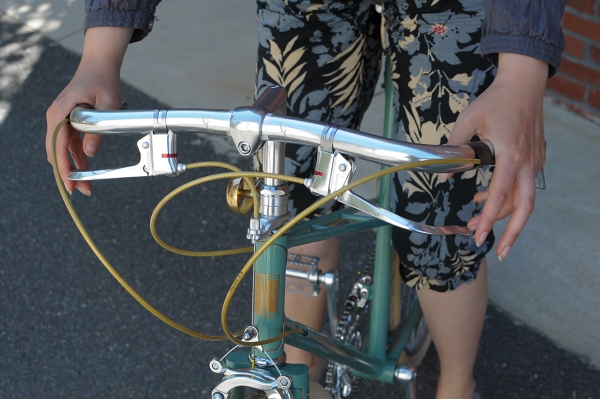
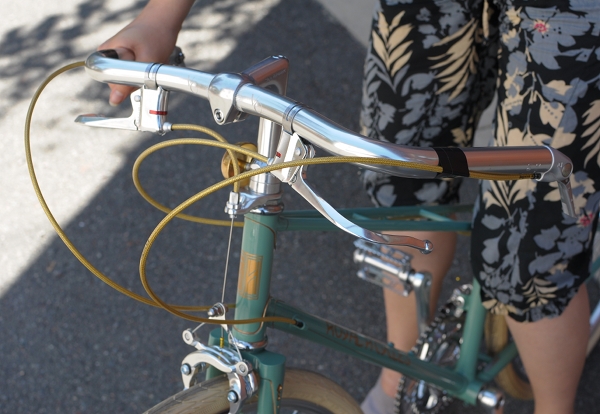
The Belleville handlebars are similar to the Porteur handlebars shown here. Both are a classic style of upright bars found on vintage French city bicycles. These bars are narrow, with long gripping areas that are nearly parallel to each other - placing the rider's hands in a position similar to holding a tray.  The Bellevilles are 5cm narrower than the Porteurs (43cm vs 48cm) and are completely straight across the front (whereas the Porteurs have a slight forward sweep).

It is typical to see handlebars like this fitted with inverse brake levers. My assumption is that this is done to maximise the gripping area of the bars. Because the levers are installed at the ends, there are no interruptions along the handlebar's surface and the cyclist is free to move their hands pretty much along the entire bar.

The inverse brake levers you will find today are most likely either Tektro or Dia Compe. Here I have installed the latter, and you can see that their brown rubbery tips go nicely with twined handlebars. It surprised me to learn that some dislike the Dia Compes because of the brown tips and prefer the Tektro levers instead - which are all-metal. To me, the rubbery surface felt nice, but I suppose it is a matter of personal preference. If you have used either of these levers, I'd like to hear your thoughts.

Braking with inverse levers.  I have found that I am able to get pretty good leverage almost no matter where I hold my hand along the bar, with the exception of the very front.

Can't brake from here, near the corners. But if I move my hands 1-2 inches back, it will work. This set-up is amazingly versatile in terms of the hand positions it allows.

The inverse levers are set back from the bars far enough so that they do not interfere with the grip. You can see in the pictures that they are nowhere near my knuckles. Truly a neat design.

If you are curious about this type of French set up, both the bars and the levers are surprisingly inexpensive. You will like them if you are a fan of narrow handlebars, and if you prefer to hold your hands to the sides rather than flared out or straight in front of you. I certainly fit that description, so both the Belleville and the Porteur handlebars feel as if they were made just for me. The super-wide Albatross bars were comfortable enough, but with the Bellevilles and the Porteurs I get that "spot on!" feeling. I also think that they are better match for French bicycles - especially for the Motobecane's aggressive handling.

I will pause and confess here, that this is the last change I will be making to Marianne... because she no longer belongs to me. Yes, I did sell her after all - to a lovely local woman whose acquaintance I had the pleasure of making this morning. Riding the Motobecane with the French handlebars and inverse levers yesterday, I finally felt that this bicycle was "perfect" and experienced a calm sense of satisfaction - not dissimilar to how I feel when a painting is finally "finished" or when a photograph looks just right. And after that, it finally felt appropriate to let her go. I hope the new owner enjoys her as much as I hope to enjoy my Royal H. mixte - which I will most definitely fit with a similar handlebar set-up.

Oh - and if anybody wants some Nitto Albatross bars (the alloy version) or VO Milan bars, drop me a line. Thankfully, I have no more "spare" bicycles to put them on.

Monday, August 30, 2010

Handlebar Hoopla, What Now?

My Royal H Mixte is almost built up, save for the fenders, racks and lights. I don't want to post glamour shots before the bike is completed, but let's just say it has some unusual features! The build has been slow, but more or less trouble-free so far... until we ran into an unexpected glitch with the handlebar setup.

My idea for this bicycle was to install VO Porteur handlebars with Silver bar-end shifters and Guidonnet brake levers.  In theory this seemed like a good plan, but in practice several things have gone awry...

First, the stem length we thought would work (6cm) is apparently too short, because when I lower the bars down to where I want them, the bar-ends overlap too much with my knee if I sharply turn the handlebars while the pedal is in the up position. So we had to exchange the stem, and thankfully the shop that sold it to us was willing to do that. We are now installing a 10cm stem and will see whether that eliminates the overlap.

But the bigger problem is the Guidonnet brake levers themselves. They look fantastically French and provide plenty of braking power, but I find their placement awkward.

As you can see in the pictures, the Guidonnets are shaped like a pair of short rod-brake levers. They are installed in such a way, that their curve is meant to follow the curve of the handlebars. And because the Porteur bars are quite narrow, my hands end up in a position that is too close to the stem when braking - which I find suboptimal in its effect on the bicycle's handling.

{Edited to add: I have now test-ridden the bicycle with these brake levers extensively. When going over 12mph, the handling in this position stabilizes; slower than that it is somewhat shaky. It is basically a very aggressive position close to the stem, similar to the "fixie grip". The levers are good if you want a  bike with swept-back bars to handle aggressively in city traffic. The levers are not so good if you don't.}

As you can see here, the Guidonnet levers don't allow you to brake from the upright position on the handlebars, but make you lean forward and move your hands closer to the stem. I find it counter-intuitive to brake in an aggressive position and shift in a relaxed position; should it not be the other way around?  I will test ride the bike some more once we install the longer stem, but I suspect that I might have to admit that the Guidonnets were a mistake - which leaves the question of what to do instead.


One possibility would be to install inverse brake levers (which I already have lying around) and fit the Silver shifters into a set of Paul's Thumbies handlebar mounts, as Renaissance Bicycles has done on the build shown above.  I have never seen Silver shifters mounted on the handlebars before, only the (considerably less classic-looking) Shimanos. Having spoken to Bryan from Renaissance about it, I learned that he has rigged up a system to make the Silver set-up possible, and I am considering emulating it.  The problem is, that the Co-Habitant is vehemently against this plan: He insists that placing the shifters on the handlebars would "cheapen a high end bike". I understand what he means, but I disagree when it comes to the Renaissance method involving the Silver shifters; I think it looks surprisingly elegant. Honest opinions?

The alternative solution would be to get rid of the Porteur bars and take the Albatross bars from Marianne - installing them in the same upside-down manner, only with bar-end shifters and with the entire bar wrapped. I could do it, though I was really looking forward to having the Porteur bars on this bicycle. Maybe there are other possibilities I am missing? I would like for this bicycle to retain a vintage French look, which I feel is better achieved with the Porteurs than with the upside-down Albatross. Suggestions welcome!

{Edited to add: the Guidonnet levers have now been sold; thanks for your inquiries!}